Rodney’s Vivid Photography Tips…
by Rodney Campbell on May.25, 2014, under Life, Photography
The festival of light, music and ideas that is Vivid Sydney is on here in Sydney for the next few weeks
As I’ve been shooting night photography for some time and have been shooting Vivid and other light projections for a couple years I thought I’d share some photography tips for those heading out to Vivid (or any other similar light projection events throughout the year here in Sydney or elsewhere)
Note that whilst I wrote this guide for shooting the various light shows at Vivid Sydney the theory equally applies for many other night time photographic activities – these photography tips are equally at home with Fireworks displays and Cityscapes, etc
Note: These photographs (especially the wider shots) look much better when larger – so click any of the images below to see larger versions in an inline overlay slideshow gallery viewer.
First some of the basics…
Tripod
If you want great photos you probably want a nice stable surface – I’d suggest a good sturdy tripod – yes I know it’s a pain to carry around but seriously it makes a huge difference. It is possible to shoot some images handheld (with a very high ISO) but unless your technique is very good (and even then for certain images it’s not enough) you’re likely to end up with massively noise ridden, grainy, detailless, blurry images
Aperture Priority or Manual Mode
Most people who get really good shots probably shoot in Manual mode and I too do shoot in Manual mode for probably a third of my shots, however I’d say my most used mode is Aperture Priority mode (because I usually want to ensure I’m getting both the depth of field I need and the right amount of ambient light)
Another thing ensure that Auto ISO is OFF – you want to basically have full control over your exposure including ISO, Aperture and sometimes Shutter Speed
Finally (and if you shoot in Aperture or Manual mode this is likely going to be the case anyway but) make sure your flash is off (unless you’ve got something like a foreground subject you want fill flash on – with Slow Sync on). I’ve seen too many people on one side of Circular Quay shooting across the harbour at the Opera House all lit up and their camera’s are firing the flash. The flash does nothing to light anything more than a couple of metres away and generally just forces your camera to use a faster shutter speed (like 1/60th of a second) basically ruining your hard work
Gear
Camera
Whilst you could technically use any camera (if you’re using a tripod) I’d suggest using an interchangeable lens camera (D-SLR, Mirrorless, etc) that supports shooting in manual mode
Lens
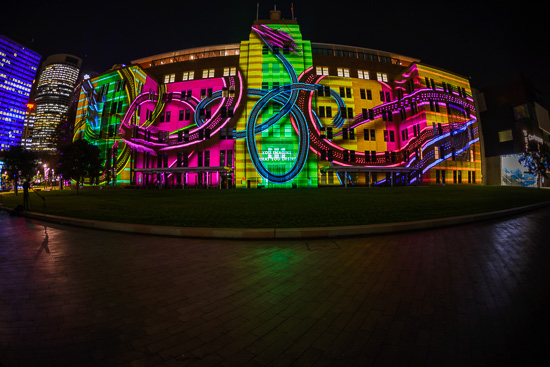
For most of my shots I’m generally using a wide angle (actually ultra wide angle) lens – in my case it is the full frame 16-35mm f/4 lens and sometimes I’m using the 15mm fisheye if I’m forced to be really close (because you just can’t get any further back or you just need to get in front of other obstacles to your shot) or you need that wacky look 🙂
I also use a 24-70mm lens as my third lens – I don’t use it that much for Vivid but it is ideal for those longer shots where you can get right back from the structures and zoom in tight. There are a couple advantages to doing this – including the least amount of distortion (including the cursed perspective distortion – you know where straight and parallel lines are NOT – e.g. the sides of the buildings are curved or angle in
Remote Shutter
I’d also suggest helping your sanity by using a remote shutter release – the two second timer can be used in a pinch but I often find timing is critical for many shots (especially as the projection displays are moving quicker and quicker towards mode video like). Personally I use a wireless remote trigger because I can step away and watch the action and still take shots
Camera Settings
RAW
If your camera supports it – shoot in RAW – you’ll have more latitude afterwards in post processing to deal with the highlight areas (which are always a problem when dealing with very bright lights at night) and also the shadowy areas (again also a given at night)
Aperture
There’s no hard and fast rule here but I’d say for most people with most lenses (and you are using a tripod or the like) I’d be looking to use an aperture in the f/5.6 to f/8 range most of the time
Unless you need a lot of depth of field or you need to force a really long shutter speed (which you may need to do for a creative or artistic look you’re going for) you probably don’t need to venture above f/8 (e.g. f/11 – f/16)
Unless you’re shooting with a very fast wide angle lens I also wouldn’t suggest going below f/4 (unless you really need to let in more light – to allow a faster shutter speed and/or a lower ISO)
ISO
Generally a lower ISO will be better if possible (you’ll get cleaner richer images with more detail, natural saturation and better dynamic range). I’m not against using higher ISO’s when needed – just be sure you actually need it – times you may need to use a higher ISO:
– if you’re shooting handheld (and thus need a faster shutter speed)
– if you need to freeze the action (and also need a faster shutter speed) because the light motion/projection is very fast (e.g. live video) and you need to freeze the display
Note: In general however with lit buildings and projections onto buildings and so forth I much prefer the look from using a low ISO and a slow shutter speed (ISO in the 50 to 800 range and a shutter speed in the 1/10th to tens of seconds range). Some people advocate shooting with much higher ISO’s (e.g. ISO 1600, 3200, 6400 and more stratospheric – it’s night after all and cameras (actually digital sensors) these days are getting amazingly good). However if you’re using a tripod I’d strongly suggest using a lower ISO unless you really have to – your images will simply POP more with all that fine detail available in cityscapes, buildings, modern projections and light installations
If I look at the 1000 shots I’ve taken at Vivid so far this year:
– 48 images were shot at ISO 3200 or 6400
– 190 images were taken between ISO 1000 and 1600
– 150 at ISO 800
– and 600 images were shot between ISO 50 and 400
so fully 75% were taken at ISO’s between 50 and 800
As mentioned before turn OFF AutoISO so it isn’t automatically ranging up to very high levels to give you a handholdable shutter speed
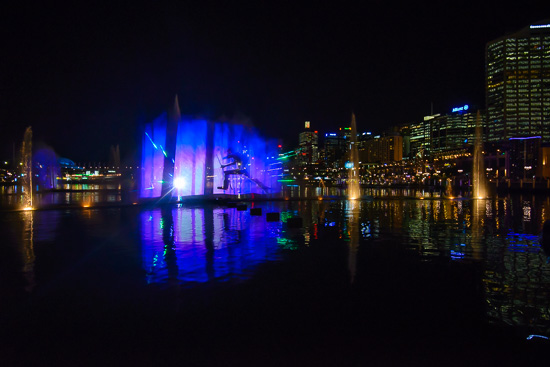
Here is a “keeper” which I was forced to shoot at ISO 3200 so I could get a shutter speed fast enough to freeze the very fast action of the video projection of the man running through the frame being projected onto the water fan at Darling Harbour
Run
The shot is OK but I can see even on my D600 (which has absolutely amazing high ISO capabilities) this image needed noise reduction in post to control the noise (which smeared the fine detail) and the detail in the city and the sharpness of the image has really suffered (esp when you zoom in). Likewise there’s a little colour banding and there’s ugly noise patterns in the shadow areas (e.g. the random blue speckles on the fringe of the water wall – it should be a smooth transition of darkening blue light – not banded and then random blue dots). On screen this doesn’t matter as much but if I printed this – it would be chalk and cheese
Also (and this is purely a creative and artistic choice) with a midrange faster shutter like this the water is “ugly” – I’d prefer the smoother more evenly reflective surface of a longer shutter speed
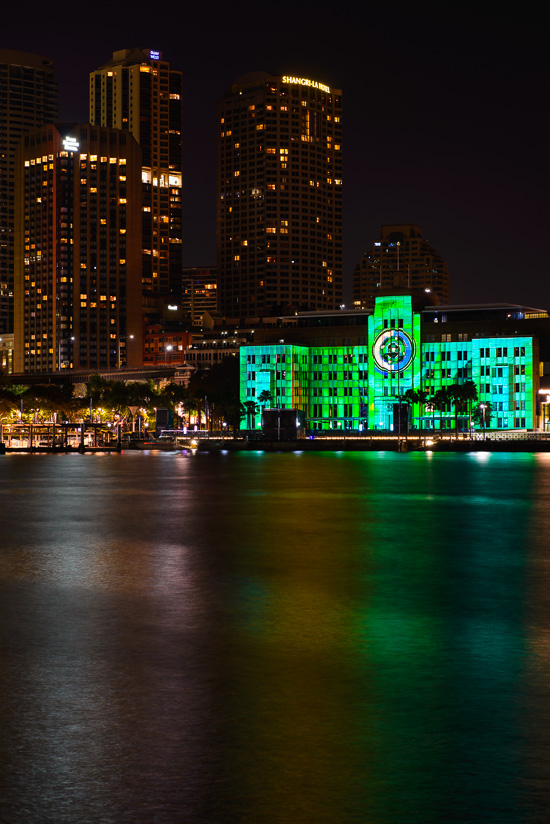
Conversely – here’s an image at ISO 50
Envy
It’s got lots of very fine detail and it’s razor sharp (even at 100%). There’s a tiny bit of long exposure noise (it was 25 seconds long after all). The colours are naturally punchy but super smooth (without needing to be over processed – where you end up with banded transitions and ugliness). Finally the better dynamic range has meant I was able to capture the whole single exposure without clipped highlights or blocked shadows and whilst I havn’t done it greatly here – it would also allow me to recover a lot more shadow detail cleanly and without stepped transitions and banding if I wanted to
If I had ND filters with me I probably would have whacked in a 2 or 3 stop Grad ND (horizon upwards) and closed the aperture a touch and gone for a 3 or 4 minute exposure to really smooth the water and allowed it to brighten for a really nice colour reflection
Shutter Speed
As I mentioned above – unless you really need to freeze the action (say a moving video sequence) – in which case you may need to use a shutter speed of 1/30th or faster (and a correspondingly insane ISO – with a correspondingly dirty image) – I’d suggest using a slow shutter speed
If I look at the 1000 shots I’ve taken at Vivid so far this year:
– the fastest shutter speed I used was 1/80th of a second and only 60 images had a shutter speed faster than 1/10th of a second
– 230 were between 1/10th and 0.4 seconds
– 300 were between 0.5 and 1.9 seconds
– 170 were between 2 and 5.5 seconds
– and 210 were between 6 seconds and 52 seconds
So you can see I prefer a longer shutter speed – obviously you have to be selective when to use a longer shutter and the timing of WHEN to take the shot becomes more critical (see below)
Exposure
Note that for most of my shots I’m shooting in Aperture priority mode so it’s actually the camera selecting my shutter speed but the way I do this is:
– I setup the camera on the tripod and take a few tests shots
– I’ll adjust the exposure compensation if needed. Depending on whether I generally need to force the camera to over or underexpose – this comes more from practice – just seeing how the environment is and how it might fool the camera. Sometimes I feel I need to protect the highlights (from blowing out – especially if there are large areas of very bright (in the projections)) so I may need to dial in anywhere from 1/3rd to a full stop of negative exposure. Other times I actually want to force an over exposure (e.g. when I want the light beams from the projectors to show when shooting from underneath the projector tower) so I might dial in anywhere from +2/3rds to +2 stops of exposure. In general however I’m a proponent of the ETTR (Expose To The Right) philosophy (expose with the histogram as far to the right as you can without clipping important highlights) – and remember the histogram is based on the JPEG preview which has less dynamic range so with RAW you actually buy yourself a little more latitude
– and watch what sort of shutter speeds I’d be getting for my chosen Aperture and ISO combination and I adjust those two parameters so that my shutter speeds are in the ballpark range of what I think I need for the light show about to happen
Note: With light shows the variation in overall brightness can and does vary quite a bit – some projections are quite dark and others insanely bright – there is usually quite a few stops of variation over time. If I’m shooting in shutter priority it may mean the shutter might end up being as fast as 1/10th of a second for some super bright sequence but fall to a slow couple of seconds for others – but I’m usually looking to setup my camera so I end up with exposure times in this ballpark area – it’s also why I use Aperture priority here (where I’m trying to take a lot of shots during a couple minute projection sequence where things change) rather than full manual
If I’m shooting really long exposures (more than about 5 seconds) I generally switch to full manual mode and dial in everything I want manually OR I shoot in bulb mode and just use my wireless trigger to fire of the start end end of frames as I wish (and in this case I’m gut feeling the exposure of the shot based on watching the light as it happens and using my experience)
Note: There is of course another very good side effect of shooting longer exposures – moving objects (like people) in your frame can tend to vanish – which is probably exactly what you want 🙂
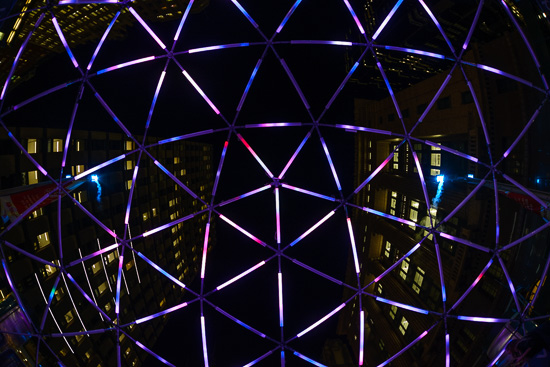
I had to shoot this handheld (I had to lie on my back on the ground to take the shot and I was going to be allowed about 5 seconds inside the structure to take a shot so a tripod was not an option – I chose the lens and setup the camera and manual focused before going inside the barrier)
Skyward
1/40th of a second handheld was plenty for the fisheye needing just ISO 400 at a relatively wide aperture of f/4 to still get everything in focus
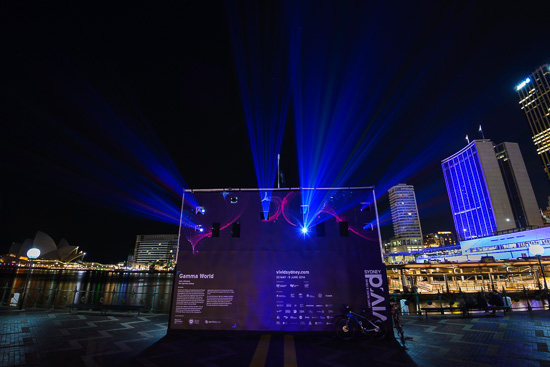
This 30 second exposure on tripod allowed me to both use a low ISO (200) and soak in the cumulative detail of the beams coming out of the projectors – you need a much longer time to let the light beams accumulate (especially in clean air) and have these striking sharp lines of colour
Vivid Rays
Timing
As I mentioned above a lot of shooting image projections is about timing – both how long to expose for (the shutter speed) AND perhaps more importantly when to start the exposure (trigger the shutter)
I’ve seen far to many people just fire away haphazardly – hoping that somewhere in there will be a great shot – or worse just take a single shot without thinking about when to take the shot
I’d suggest watching the entire sequence – basically with any light projection show it runs on a loop. There’s a set sequence of “video” projection that runs for a certain period of time – be it 2 minutes, 4, 6 or more – but basically the show runs for a certain amount of time and then pauses and loops again. You NEED to watch the whole thing first so you can plan and anticipate NEXT time when to trigger your shots
Here is what you’re looking for
– times for when the display is essentially static for a while (or at least some major parts are static) – these times are perfect for a longer shutter speed (which allows you to use a much lower ISO and get cleaner, richer more saturated images with no grain, noise and other detail and dynamic range robbing artifacts)
– times when a lot of motion occurs but the – and I’m not sure how to fully describe this – the overall blurring of the light and colour over time achieves something new and good – i.e. the end result is better than the original projection – you’re not capturing one frame but the combination of a number of frames over time. This might result in a wash of tones of a single primary colour or a result which “looks” like motion in the image
Then when the loop plays again you’re prepared to trigger the shutter at the right times
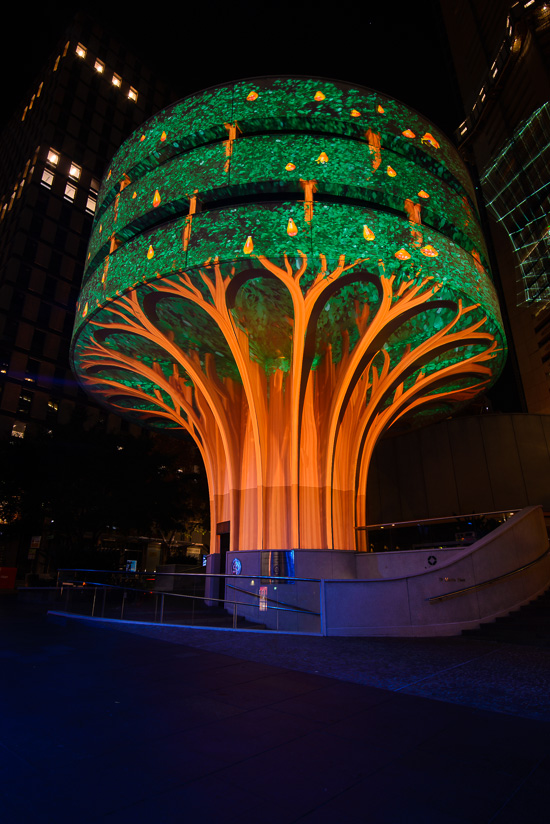
I waited till this relatively static image was displayed in this projection sequence to take this shot
The Mother Tree
This allowed me to take a 6 second exposure at ISO 100 and f/8 to have a super clean and super sharp and detailed image (even blown up to 100%)
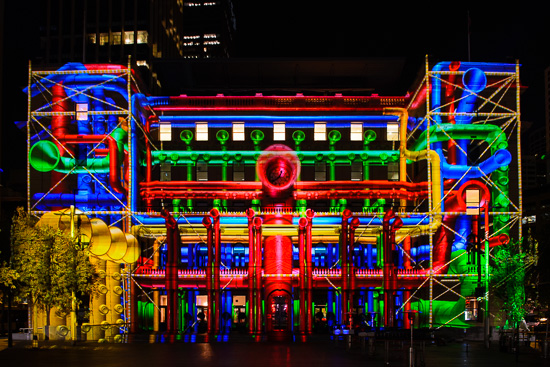
and another example – this projection sequence had some very fast paced scenes but by waiting till this portion where the majority of the display is static except that central red horn which appears to be blowing I can shoot a half second exposure at ISO 400 instead of a 1/30th second exposure at ISO 6400
Vivid Funk
In the following shot which you don’t really see with the naked eye during the projections – the circle expands out with various colours over a period of time – but by taking a 3 second exposure I can shoot at ISO 800 rather than trying to freeze the action by shooting wide open at f/4 and 1/10th of a second at ISO 25,600 (and getting a noisy featureless mess which still isn’t sharp). My 3 second image is still “sharp” and has nice smooth rich tones of colour
Composition
This last set of photography tips is about composition – there will be tens of thousands of other photographers taking shots at Vivid so coming away with killer shots that stand out won’t be easy. Sure you want to get the postcard shots – we all do – but you also want to try some different things, whether that’s to get down low and shoot up, get up high and shoot down, do a stitched panorama, shoot from an interesting side angle, include some interesting foreground interest, shoot wider and include the environment around your chosen subject, go long or shoot in tight and exclude everything else, turn around and shoot whats behind you that no-one is looking at. Part of this is just the exercising of your brain and making it more interesting for yourself and if you’re really lucky you’ll come away with that epic shot no-one ever thought of taking before
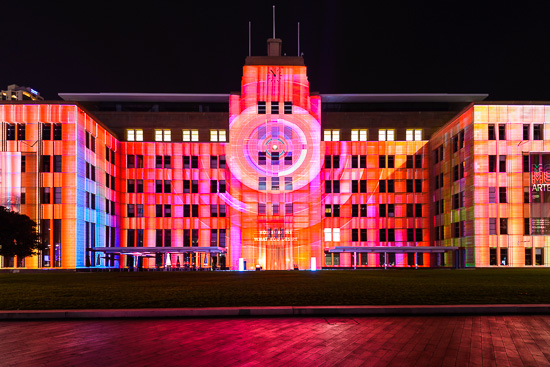
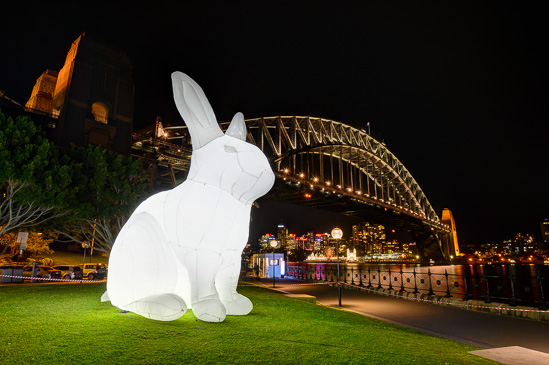
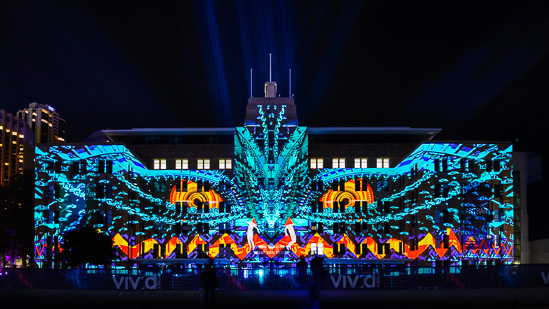
and finally here’s a couple of other shots from Vivid this year… many more to come in future posts I’m putting together…
Snakes
Hoppin’ on the Coathanger
Those Eyes
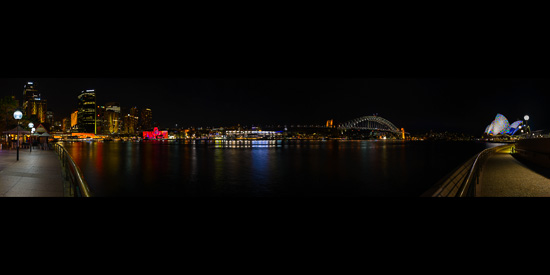
and finally this stitched panorama comprised of twelve (12) vertical frames covering about 230º – with each frame shot optimally at f/8 for 15 seconds and ISO 50
Vivid Harbour
