Archive for March, 2013
Review: Pro Camera Waterproof Cover Rain Coat for Digital SLR…
by Rodney Campbell on Mar.20, 2013, under Life, Photography
Because I sometimes get caught out shooting on a tripod when it might rain or the camera might otherwise get wet (e.g. sea spray) I decided to purchase a relatively cheap waterproof rain cover for my DSLR to take for those times when I might need it.
After a little online searching I decided to get this Pro Camera Rain Waterproof Cover Coat for Digital SLR from eBay for just under AUD$18 delivered.
The cover folds up into a very nice small (fist sized) bundle which is easy to put in my camera bag when I need it but has a number of useful features which make it more ideal for my intended use and the type of shooting I do.
– has a double side zip opening at the bottom to allow you to place it over a camera on a tripod
– has a clear top and back area allowing visibility of the camera, controls and LCD’s
– has draw string side sleeves allowing you to safely put your hands and arms in to control the camera
– has a draw string front hole which extends out over the lens barrel – so you can pull it tight out near the front of the lens
– it also has a built in stiff lens hood piece with velcro on both sides so you can wrap it around your lens out near the front with a bit of a roof piece at the top so it can shield the front of the lens and the front element from rain
– it also appears to be quite well made
I’ve used it a couple of times now with no issues – yes it’s a bit more cumbersome and clumsy than without using it but it sure beats the heck out of having your camera and lens in the rain. The only negative for me so far is that when it is raining and it’s dark it can be a little hard to see the screen through the clear back plastic.
Basically this thing is very cheap (under $20) for what you get and appears to be the same as other much more expensive models I found online. It is still a little more expensive than some other items I also found in my search, however they looked to be more like a very thin disposable plastic raincoat/bag.
… and if you’d like to avoid the whole $20 expense thing you could always make your own DIY Rain Guard For Your Camera From An Old CD Spindle.
South Newport Tidal Pool @ Sunrise…
by Rodney Campbell on Mar.18, 2013, under Life, Photography
Joined the FOCUS Flickr group for a dawn seascape shoot at South Newport Tidal Pool over the weekend followed by some great breakfast company at a local cafe.
It was a lovely morning to be out – the weather was very kind – a T-Shirt morning even at 6AM, very little wind and some nice cloud formations in the sky.
Note: These images (especially the wider shots) look much better when larger – so click any of the images below to see larger versions in an inline overlay slideshow gallery viewer.
This first is a 2 minute long exposure at a quarter past 6 (about 35 minutes before sunrise) – taken with the 16-35/4 at 18mm @ f/11 and ISO 100 – with the Lee 0.9 hard grad and the Heliopan CPL
Newport Streaks
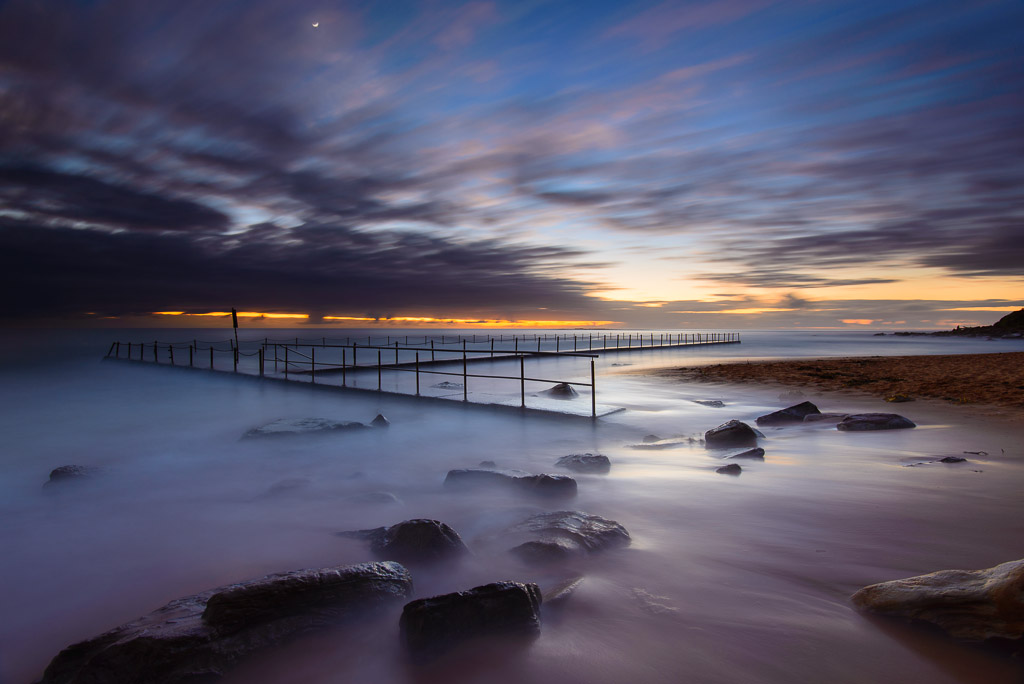
NIKON D600 + 16.0-35.0 mm f/4.0 @ 18 mm, 120 sec at f/11, ISO 100
NIKON D600 + 16.0-35.0 mm f/4.0 @ 18 mm, 120 sec at f/11, ISO 100 + Lee 0.9 Grad ND + Heliopan CPL
For the following I had to bump the ISO (to 800) and open the aperture a little so I could get a faster shutter speed – I wanted texture in the water movement and not misty milk this time
Peachy
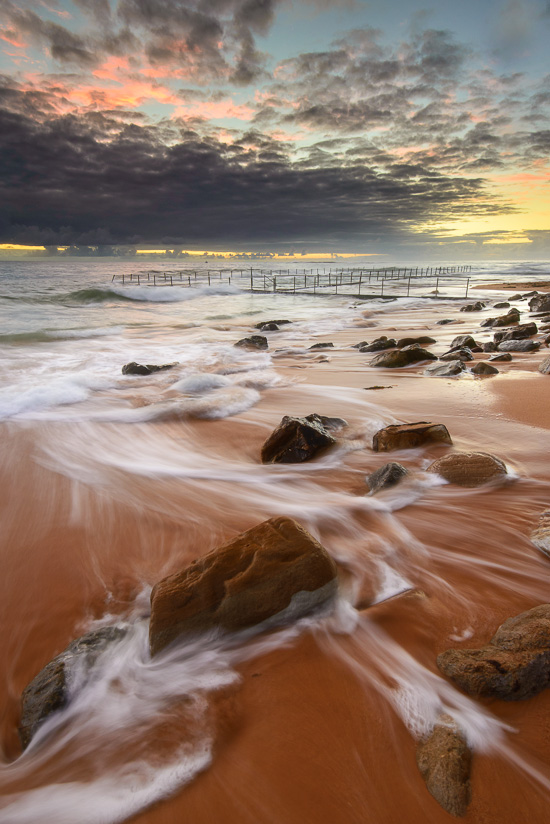
NIKON D600 + 16.0-35.0 mm f/4.0 @ 20 mm, 1/2 sec at f/9, ISO 800
NIKON D600 + 16.0-35.0 mm f/4.0 @ 20 mm, 0.5 sec at f/9, ISO 800 + Lee 0.9 Grad ND + Heliopan CPL
Just on sunrise and we were getting varied colour in the sky at this stage
Stranded
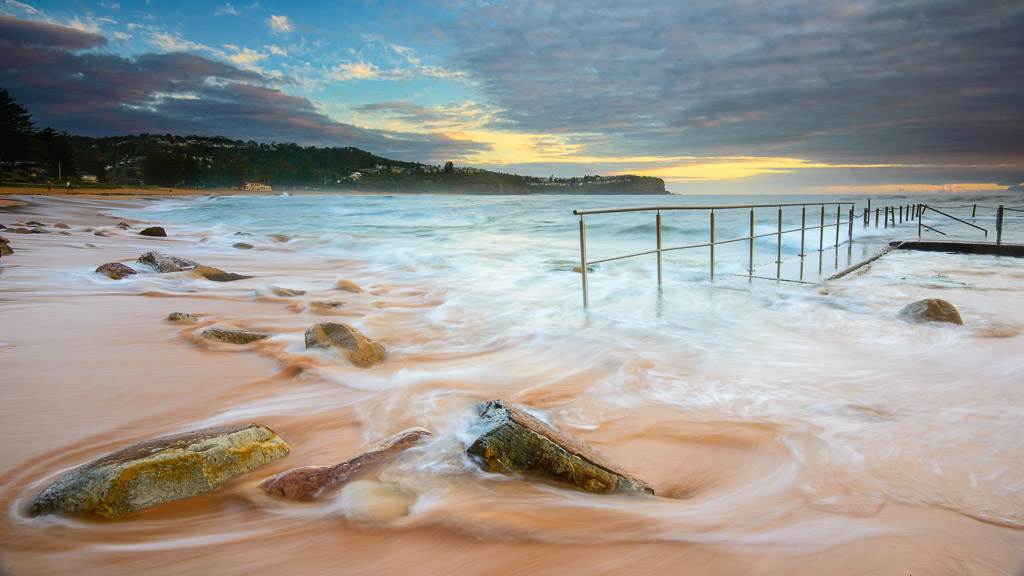
NIKON D600 + 16.0-35.0 mm f/4.0 @ 19 mm, 1/2 sec at f/11, ISO 200
NIKON D600 + 16.0-35.0 mm f/4.0 @ 19 mm, 0.4 sec at f/11, ISO 200 + Lee 0.9 Grad ND + Heliopan CPL
and a little after sunrise the clouds were getting heavier but we had a nice show of god rays on the horizon
Ebb and Flow
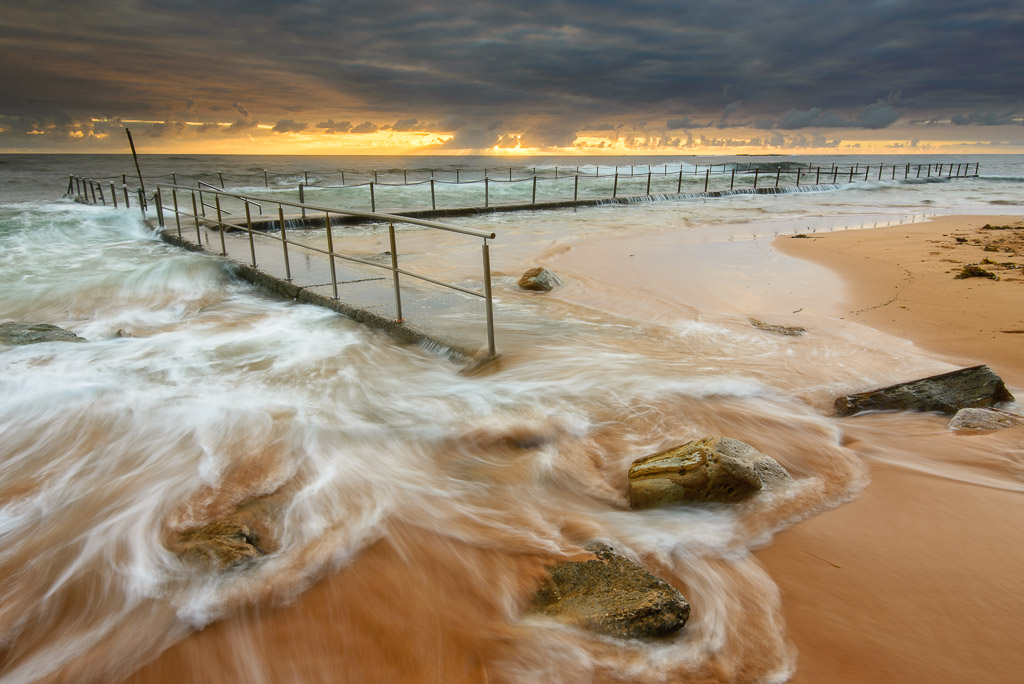
NIKON D600 + 16.0-35.0 mm f/4.0 @ 22 mm, 1/2 sec at f/11, ISO 100
NIKON D600 + 16.0-35.0 mm f/4.0 @ 22 mm, 0.4 sec at f/11, ISO 100 + Lee 0.9 Grad ND + Heliopan CPL
and finally I returned to an earlier composition I liked with the rocks in the sand along the beach and coastline – and now with a moody sky and the conditions right for the shutter speed I wanted. 16-35/4 at 18mm and 1/4sec @ f/11 and ISO 100
Stormy Coast
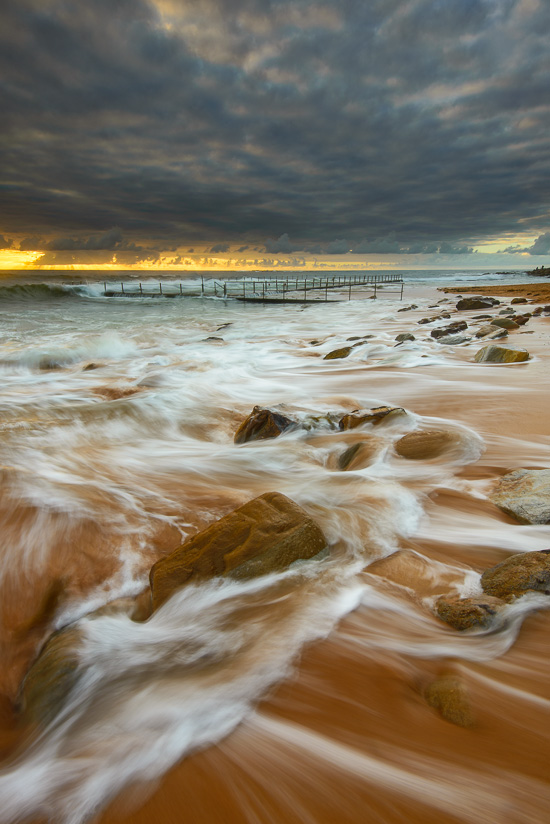
NIKON D600 + 16.0-35.0 mm f/4.0 @ 18 mm, 1/4 sec at f/11, ISO 100
NIKON D600 + 16.0-35.0 mm f/4.0 @ 18 mm, 1/4 sec at f/11, ISO 100 + Lee 0.9 Grad ND + Heliopan CPL
Review: Kirk BL-D600 L-Bracket for Nikon D600…
by Rodney Campbell on Mar.16, 2013, under Life, Photography
I do quite a bit of landscape work – I like the slow contemplative work. I also do the odd stitched panorama and as of late have been doing more of them.
I’d been thinking of investing in an arca swiss compatible L-Bracket for my camera for some time (at first for my D7000 and more recently for my D600).
For those unfamiliar with L-Brackets (or L-Plates) then essentially these are a right-angle quick release “plate” which fits the base of your digital or film camera. It’s advantages are that allows you to quick release, turn and remount your camera for either a horizontal or vertical shot without having to change your tripod, head, level or composition. You no longer have to flip your tripod head to the side which can change the height, composition, etc of your camera. Most L-Brackets also allow easy access to the camera battery and I/O ports with the plate attached. In fact most brackets are designed to be left on the camera permanently and most brackets are also designed for one specific camera in mind (you get the specific plate model to suit your camera (and whether it has a battery grip or not)).
I considered a number of different L-Brackets for my D600 including the Really Right Stuff BD600-L, ProMediaGear PLND600 and Hejnar Photo D600 L Bracket but I finally decided to order the Kirk BL-D600 from B&H Photo.
I would have likely purchased the Really Right Stuff bracket except for one thing – with the D600 it is not compatible with Nikon’s LCD screen protector – in other words you have to permanently remove the LCD protector screen when you have the L-plate on. For me this was unacceptable so I went for the well respected Kirk option instead.
The Kirk BL-D600 is a custom made one-piece bracket machined from light weight 6061T6 aluminum. It’s not as “glossy” as the RRS bracket but it is very well made and fits the camera like a glove – like it should.
The plate does not require you to remove the LCD cover and it does allow you some flexibility on how close you fit the plate to the side of the camera body (so it can be offset from the body if you so desire – I’ve offset mine by a couple of millimetres).
There are nice finger cutouts on the edge of the plate which allow you to reach in to the side port flap covers and all the I/O ports (e.g. mic/headphone, USB/HDMI and remote) are readily available – which was essential for me since I often use a wired remote release (even my wireless one still plugs a dongle into the wired side port) so I *need* to still be able to open and access the small lower side door of the camera. Note when I say I want to be able to open the side door with the plate on I don’t mean open the door first and then put the plate on (which all can do) but rather leave the plate on and open and close the side flaps whenever I want – with the Kirk BL-D60 I can definitely do this.
One small gotcha with this is that surprisingly whilst it’s easy to open that small flap with the plate on the plate slightly overlaps the hinge (front of camera) side of that flap so you are forced to ever so slightly bend that flap door to open it fully – this is why I offset the plate on my camera by one or two millimetres so the flap was easier to open fully wide. I would have preferred it if the plate mounted one millimetre or so closer to the front of the camera – however whilst the plate allows flexibility in the sideways mounting of the plate – there is no front to back flexibility (due to the angled bits which grab the front and back edges of the camera to hold it firmly in place without rotation).
It is also easy to open the USB flap and there are no problems having the WU-1b wireless mobile adapter in the USB port with the plate on.
Another plus is that even with the door open and the remote cable in I can still mount the camera vertically more towards the edge of the arca clamp with the cable going past the clamp edge.
I’ve had no problems using this plate with my existing arca swiss style heads and clamps – the main one I use is a screw clamp so I would not anticipate any jaw sizing issues. I’ve yet to try it with an RRS ballhead and lever clamp – this is where the slight tolerance differences between different manufacturers “arca-swiss” standards may come into play. I have friends with RRS gear so I will endeavor to see how it fits (given that one day I would like to upgrade to an RRS ballhead and lever clamp (like the BH40)).
So far I’ve been very happy with the L-Bracket – and would be confident in recommending it to anyone looking for a well made and functional piece of kit.
Queen Mary 2 in Sydney Town…
by Rodney Campbell on Mar.13, 2013, under Life, Photography
The Queen Mary 2 arrived in Sydney Harbour very very early in the morning. I was intending on joining a Flickr group for an early morning shoot from around Dawes Point as the ship came into the harbour and then do sunrise. The pilot and tugs were expected to be bringing her in around 4:30AM so I woke very early and headed down to the Rocks.
I planned to take some images from the middle of the Harbour Bridge first which would include the city around past the Opera House and then down the harbour towards the arriving QM2. So I made my way up onto the deck of the bridge and started some test shots at 4AM!. There was no QM2 in sight and the sky was clear and dark (with a small crescent moon high in the sky). I figured it was still a few hours till sunrise so I decided instead to setup for some city star trails from up high.
The following is the result of stacking 230 images shot with the 16-35/4 at 17mm with the camera set to 25 second exposures at f/4 and ISO 400. Normally for star trails I’d prefer a completely dark sky with no light pollution and use something like 60 second exposures at ISO 1600 to really bring out the stars. Here the city (and the QM2) was insanely bright so I had to reduce the exposure 3 or 4 stops just so the city and sky wasn’t too nuclear. Still I wasn’t all that hopeful but let her rip for an hour and forty minutes before twilight (an hour before sunrise) started really brightening the sky killing all the stars. I also took some separate twilight exposures to use to blend in at the bottom for the harbour, land, buildings, etc.
During the sequence of images my biggest concern was how much the bridge was moving up and down when trains and vehicles came across and how this was going to affect stacking – there was some but it wasn’t too bad in the end I reckon.
Note: These images (especially the wider shots) look much better when larger – so click any of the images below to see larger versions in an inline overlay slideshow gallery viewer.
QM2 Under the Stars
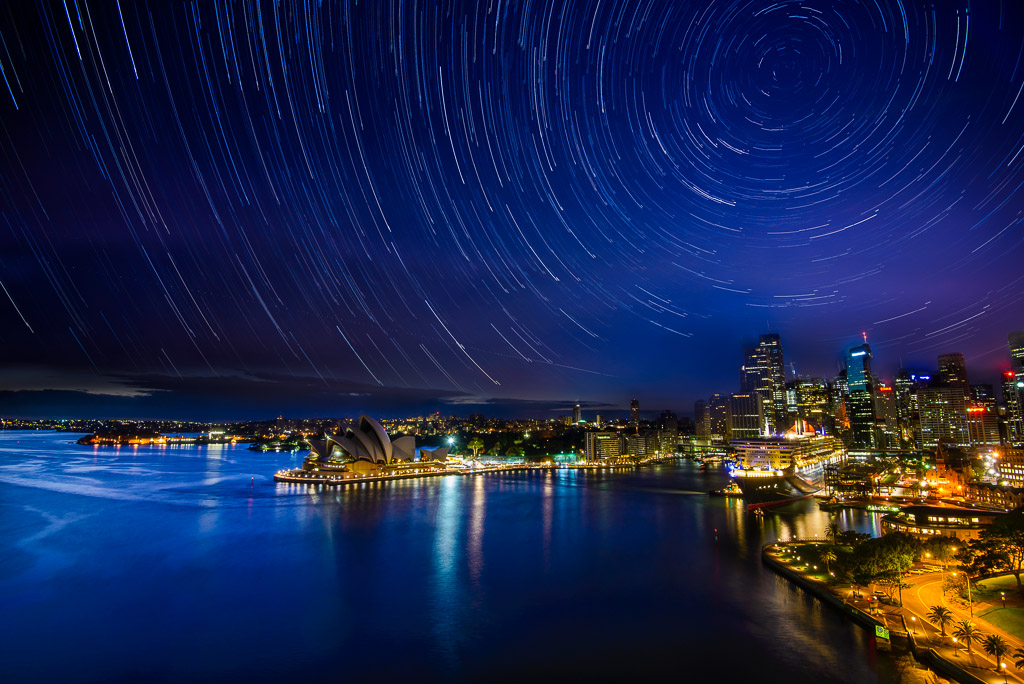
NIKON D600 + 16.0-35.0 mm f/4.0 @ 17 mm, 25 sec at f/4, ISO 400 x 230 frames
NIKON D600 + 16.0-35.0 mm f/4.0 @ 17 mm, 25 sec at f/4, ISO 400 x 230 frames stacked for star trails blended with a 30 second @ f/11 and ISO 400 twilight exposure
That QM2 is one massive ship – when I first saw it coming into the harbour in the distance (and it was late :)) it looked tiny and I was a little disappointed – it literally took 30 minutes for the tugs to bring it down to the bridge. At this stage when it was almost below me it looked absolutely enormous – and lit up like a Christmas tree. The tugs then pushed the back of the ship 90 degrees in towards circular quay, then another 30 minutes to back the QM2 into the quay and then they pushed it slowly sideways till it was against the Overseas Passenger Terminal dock which took another 15 minutes
I took some more images from the bridge till just after 6AM and then made my way down towards Dawes Point to take some shots around sunrise
A little long exposure BigStopper work just after sunrise with the Sydney Park Hyatt and the QM2 framing the Opera House
QM2 Harbour Blues
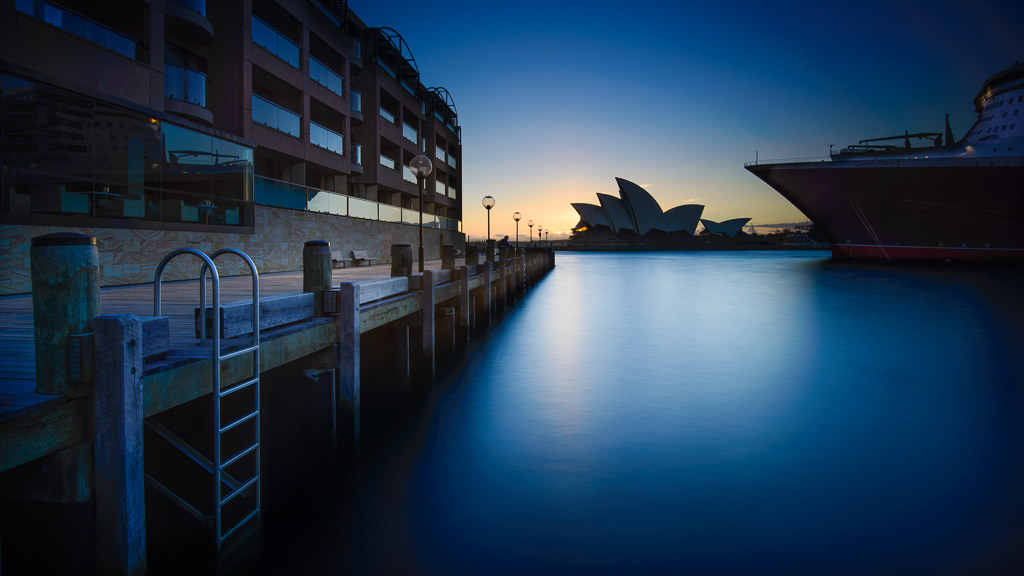
NIKON D600 + 16.0-35.0 mm f/4.0 @ 20 mm, 74.00 sec at f/11, ISO 400
and this one just so you can see how big this ship is in Circular Quay – both in length and height – remembering that I’m way up on the deck of the Harbour bridge for this shot…
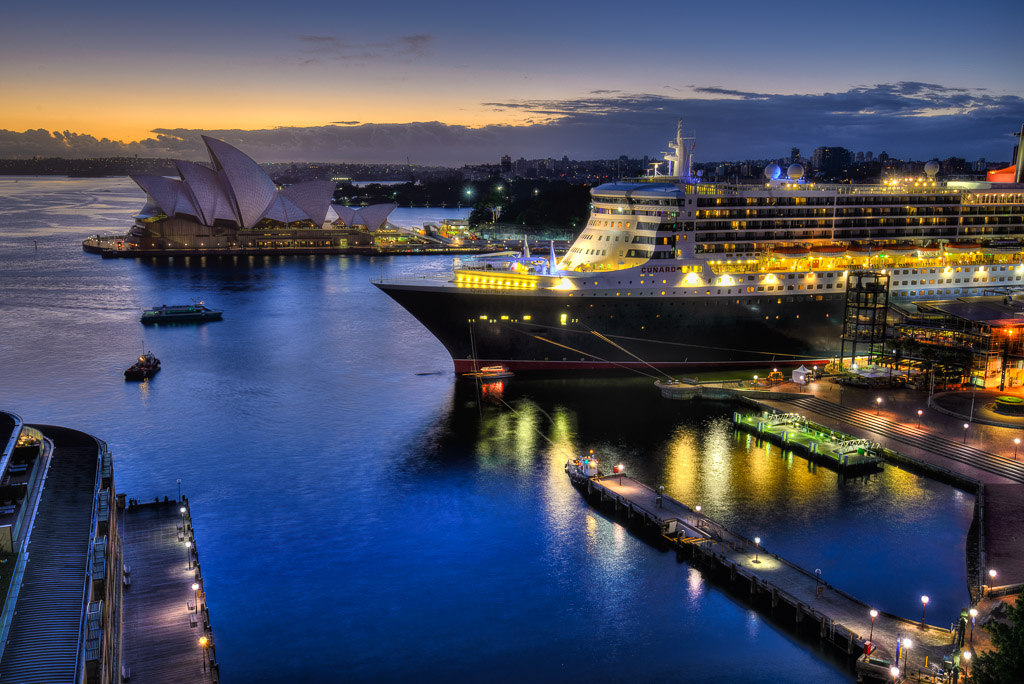
NIKON D600 + 16.0-35.0 mm f/4.0 @ 32 mm, 1.60 sec at f/11, ISO 200
Birding with the 85/1.4…
by Rodney Campbell on Mar.11, 2013, under Life, Photography
I know it’s not your typical birding lens but I just received my first of my new Sigma lenses that I won. I unboxed the Sigma 85mm f/1.4 lens and since there was this very accommodating Kookaburra in our back yard (and he needed to be since I was right up in the birds face) I figured I’d try some bird portraiture 🙂
I havn’t AF calibrated this lens yet (with Reikan Focal) so these results are straight out of the box – that said looking at the images at 100% I got a very good hit rate of in critical focus captures and the AF looks to be pretty close to spot on.
This first is shot at a depth of field frightening f/2.0 up close (at 100% pretty much only the surface of the eye and feathers in the same plane are in focus and it falls off to blur very quickly either side – e.g. the chest and beak and the back feathers)
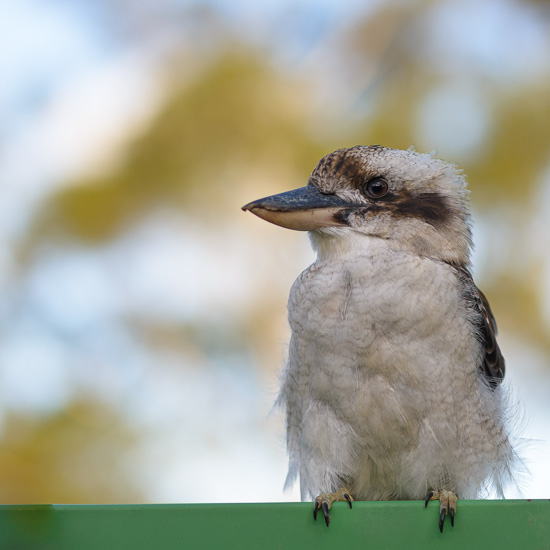
NIKON D600 + 85.0 mm f/1.4 @ 85 mm, 1/800 sec at f/2, ISO 100
A little further away at f/2.8 and we have a little more dof to play with

NIKON D600 + 85.0 mm f/1.4 @ 85 mm, 1/320 sec at f/2.8, ISO 100
I’m just checkin’ you out…
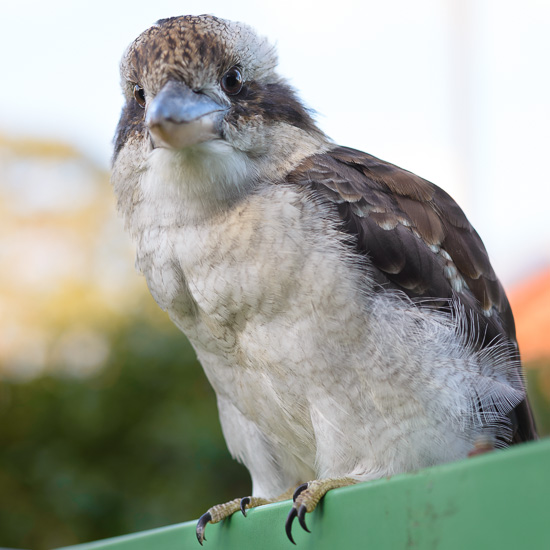
NIKON D600 + 85.0 mm f/1.4 @ 85 mm, 1/200 sec at f/4, ISO 200
-
Hi! Welcome to Rodney Campbell's Blog!
Thanks for dropping by! Feel free to join the discussion by leaving comments, and stay updated by subscribing to the RSS feed. See ya around!
Follow Me!


