Archive for April, 2015
The Many Faces of Admirals Arch…
by Rodney Campbell on Apr.29, 2015, under Life, Photography
During our stay at Cape du Couedic in Flinders Chase National Park we visited nearby Admirals Arch a number of times.
A viewing platform and boardwalk around a cliff face leads visitors to this spectacular natural rock arch known as Admirals Arch, sculpted by weathering and erosion from the sea over thousands of years.
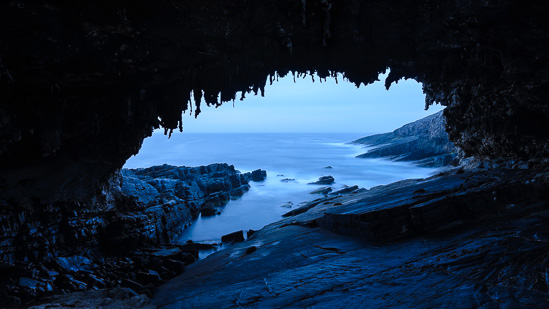
Admirals Arch in Blue
Note: These photographs (especially the wider shots) look much better when larger – so click any of the images below to see larger versions in an inline overlay slideshow gallery viewer.
The Arch was an easy five or ten minute walk from where we were staying and one of the reasons we did was to see the colony of New Zealand Fur-seals on the rock platforms around Admirals Arch. These dark brown seals feed at sea but return to land to rest and breed. My girls particularly enjoyed seeing all the baby fur-seal pups playing in the rock pools around the arch.
We mostly visited here in the evenings around sunset (because the view from the boardwalk through and under the arch faces west), unfortunately every time we were there we either had heavy overcast conditions or clear blue skies so we never had the richly coloured cloud filled sunsets I was looking for in a composition here.
The very long exposure blue with extremely overcast skies taken at 8:55PM (25 mins after sunset) up at the top typifies the look.
You don’t have a great deal of compositional or location freedom at Admirals Arch as the entire area from up the top to right down here under the arch is restricted access, you are only allowed on the boardwalks themselves and you aren’t allowed into any of the areas where the seals go.
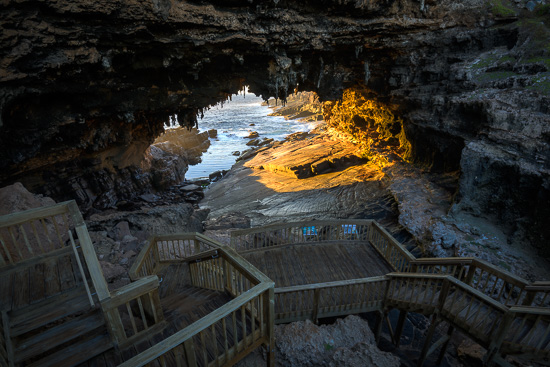
This is the boardwalk and viewing platform under the arch itself and at sunset you can get quite a crowd of people down here, tourists and photographers. On this evening (our last on Kangaroo Island) I was lucky enough to have the place to myself for a while.
Admirals Boardwalk
Lighting wise this location is a bit of a photographers nightmare. With the light coming through from in front of you the arch itself and this side of the arch from where you shoot is in complete shadow. A normal single exposure of the scene looks like the New Zealand Fur-seals image above with the arch a complete silhouette. If you want to see any detail in the foreground and the roof of the cave/arch you need to bracket your exposures across a very wide range of stops to deal with the massive contrast range.
Even shooting here at sunrise wouldn’t help as behind the viewing platform the rock rises very high and shields most of the arch itself from the sun till it is quite high in the sky.
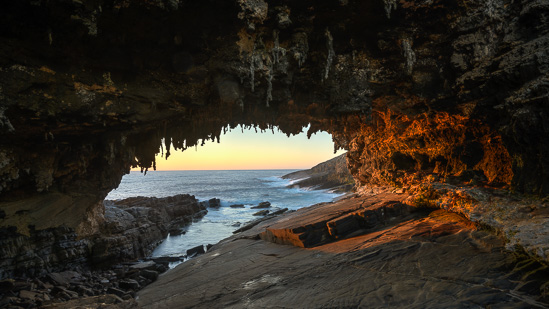
This is the classic composition and view through the arch towards sunset. The sun has just set on a typically cloudless evening, tho we did have a touch of pastel in the sky. Here you can see another unique thing about Admirals Arch – it has stalactites which dangle from the rocky ceiling of this former cave. This is an HDR merge of 5 frames with exposure times ranging from 1/3 sec through to 30 seconds with the warm golden orange glow of sunset hitting the arch walls on the right.
Admirals Sunset
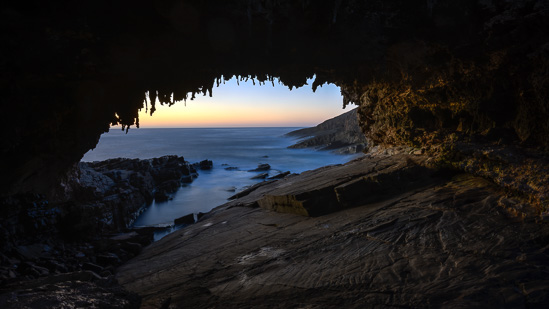
and 30 minutes later we are well into twilight. This image is an HDR merge of 9 manually exposed frames with exposure times ranging from 1.3 seconds through to 136 seconds.
Twilight Arch
Another interesting issue with this location is the smell – with hundreds, if not thousands of seals all over this area the smell they generate can be somewhat overpowering. Down here under the arch especially in the damp and enclosed area it was rank. All those animals and the other things they bring also meant for a massive breeding ground for mosquitos and after sunset when it got a little dark they really came out in force :(.
Unfortunately I never got the shot I was looking for. With very little compositional choice and devilishly tricky conditions I think you need to be lucky to get the exactly the right weather conditions at sunset at the right time of year when the sun is aligned with the view through the arch.
A Practical Use of Polarisers in Landscape Photography…
by Rodney Campbell on Apr.27, 2015, under Life, Photography
A Circular Polariser (or Polarizer for our North American friends) is one of those few filters which is an almost essential piece of kit for any landscape photographer. It’s one of the few physical filters which can’t be replicated in post processing (e.g. in Photoshop).
There are numerous articles online which will go into the technical aspects of how Polarisers work. However for the purposes of this article I mostly want to provide some concrete examples of why they might be useful to a landscape (or in this case seascape) photographer.
Most people know of some of the simplistic effects of a polariser – like making blue skies bluer. However they also have many other useful effects like being able to cut through reflections (on reflective surfaces like water, glass, chrome and so on), reducing the glare off shiny objects (like wet rocks, leaves and so on) and also helping to improve contrast and saturation in images. One other sometimes useful benefit is that the circular polariser can also provide an easy one to two stop neutral density effect to slightly increase exposure times when needed.
Circular polarising filters can be rotated to maximise or minimise admission of polarised light. Rotating the polarising filter will make polarised light stand out or nearly disappear depending on how much of the light is polarised and the angle of polarisation.
I’d intended on holding an online discussion with my Arcanum mastery cohort to explain this topic of circular polarisers and their practical use in landscape (or in this case seascape) photography. So whilst I was out shooting one morning I shot some test frames to highlight in my discussions.
In each of these cases I’ve framed a composition I like and setup all the other parameters (camera, lens, filters and other gear along with camera settings) for shooting the scene as I normally would. However in each case I’ve taken a few shots (with exactly the same framing, etc) with the only adjustment being rotating the circular polariser to adjust the level of polarisation of the scene.
The day was very overcast and it was pre dawn so the light was much more even and scattered than you would find on a clear day however even in these conditions the polariser can be used to great effect.
Note – I’m not specifically advocating that the choice of one polariser setting is necessarily better or worse than another. The aim here is not to pick a winner but to understand that there are options. The main point I am emphasising here is that using a polariser AND adjusting it’s settings “can” make a dramatic difference to the end result and you may as the photographer prefer one look over another and it is your choice to select as you see fit.
These images are essentially straight out of camera with a slight boost in the RAW processor to remove the dullness (akin to selecting the Landscape JPEG preset in camera) and some other slight adjustments to equalise the overall exposure between images.
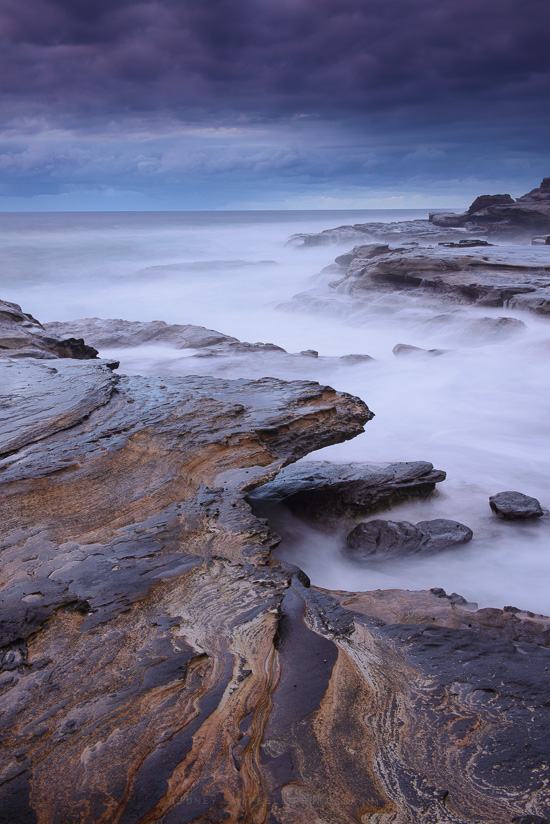
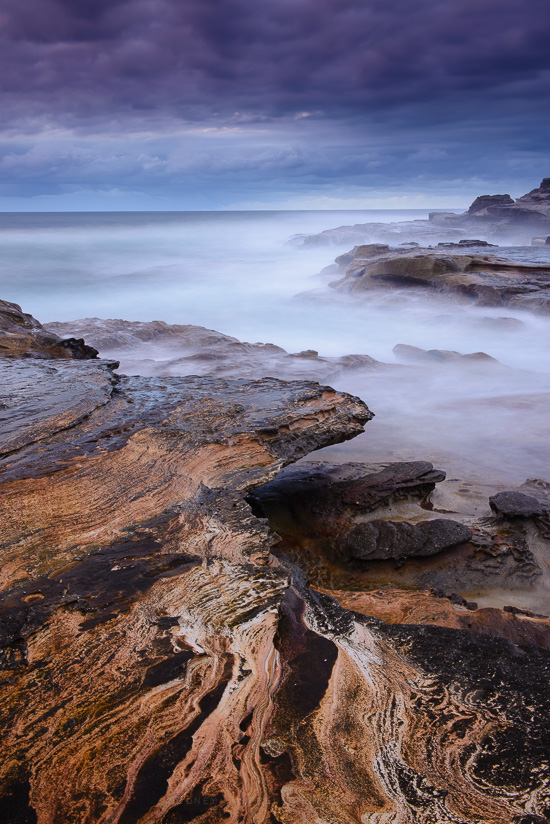
In this first example we first show the scene with the polariser set to do very little – i.e. we have a lot of haziness and glare off the thin film of water over all of the wet rocks. Then the polariser is rotated to set it to cut through as much of the reflected glare as I could – this allows you to see through to the colourful wet rock beneath. Another typical use case just like this is when photographing waterfalls – when you want the falling white water to appear against nice dark wet rock behind and not a wall of hazy white contrast sapping reflective rock.
Thin Film Reflection on Rocks
Cutting Through
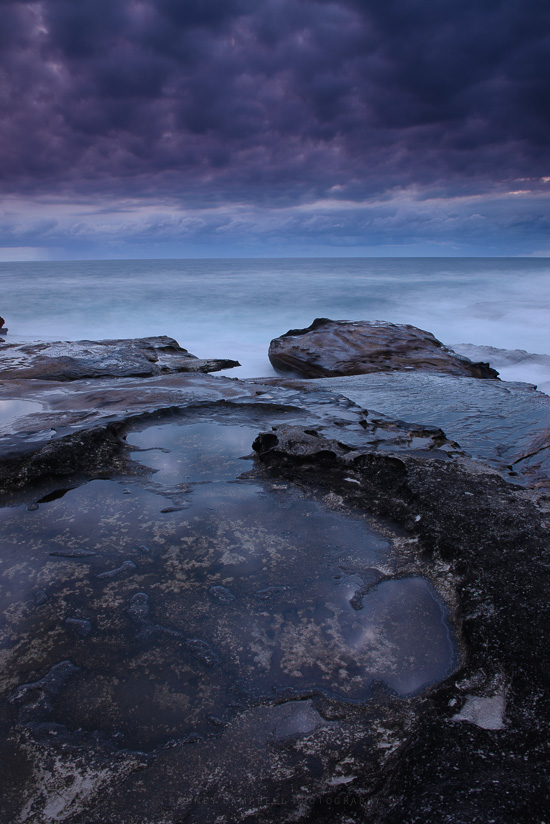
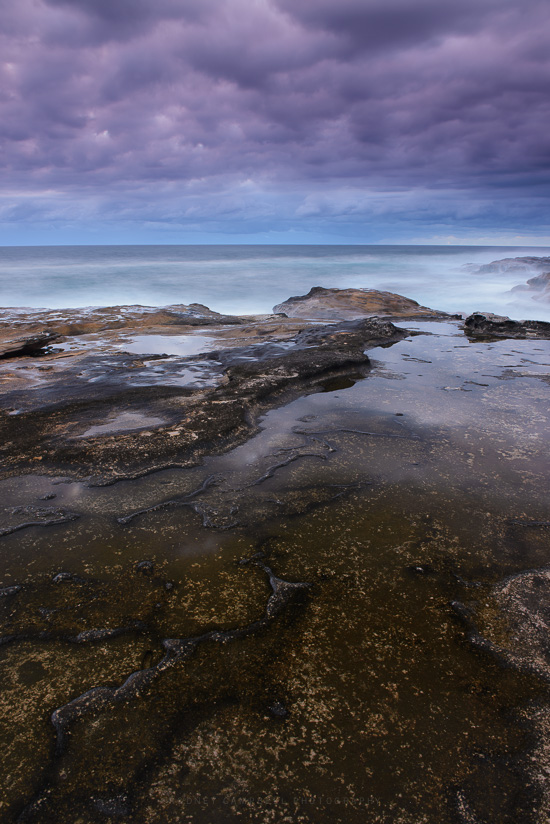
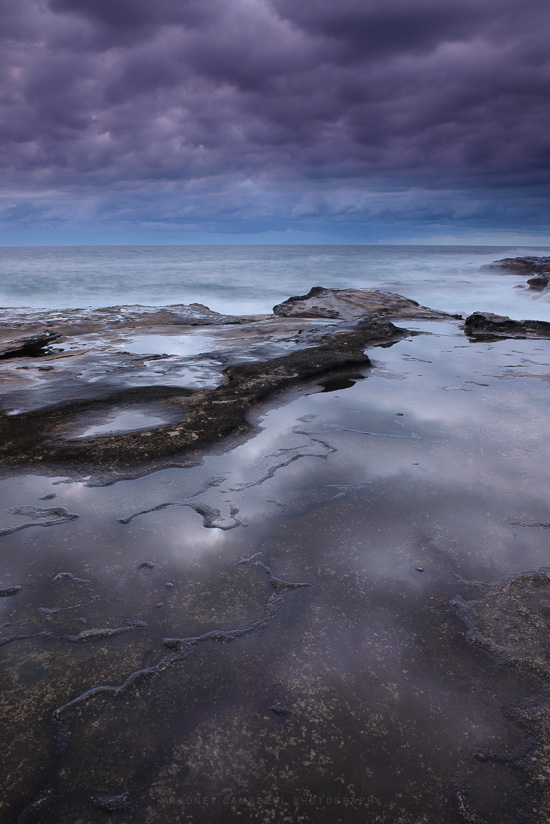
In this next set of three images we have a rock shelf where the rocks are all wet with sea spray and waves and I’ve composed a shot to include a largish shallow pool of water in the foreground.
The first shot is where I’ve adjusted the polariser to cut through the reflections off the surface of the pool and see through to the rock underneath. In the second I’ve adjusted to the opposite end where I have the maximum amount of reflection off the surface of the water (and as it happens off the rocks all around as well). Finally in the third image a minor adjustment again which is part way between – so it’s partially reflective and partially cut through.
Max Polarised
Min Polarised
Slight Polarised
Some more examples…
Removing Water Surface Reflections
Maximise the Reflections
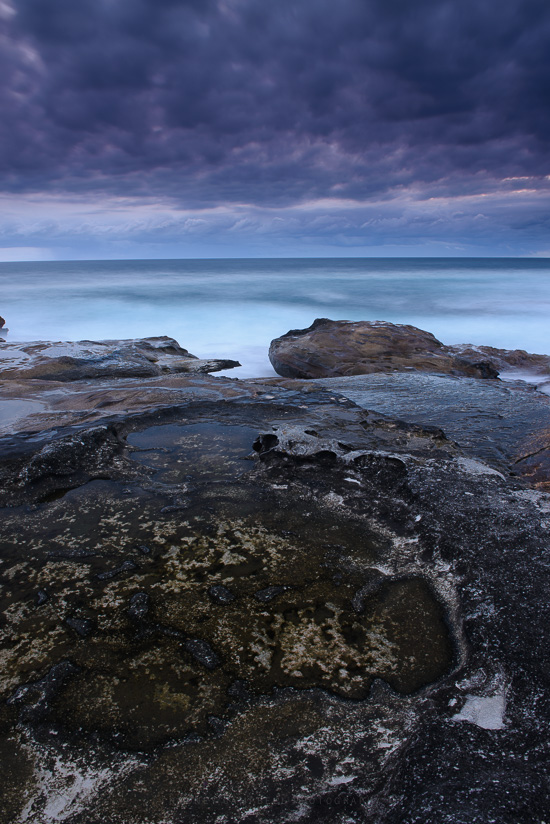
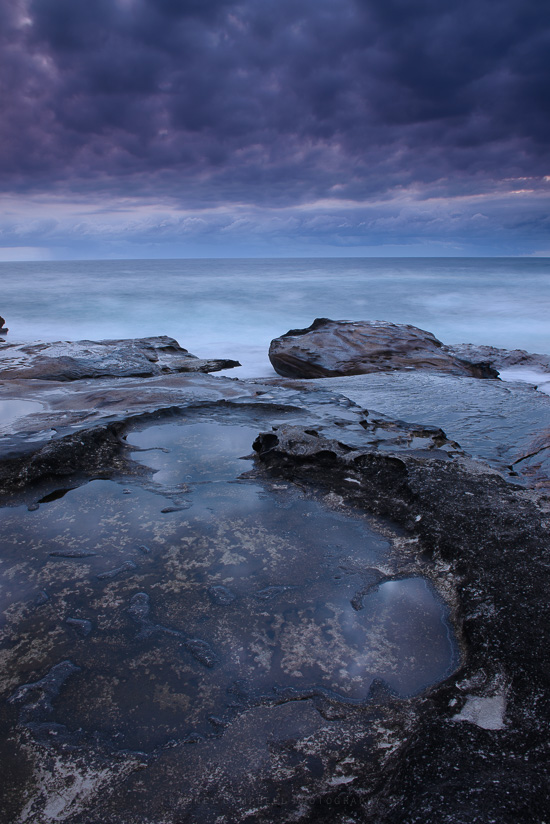
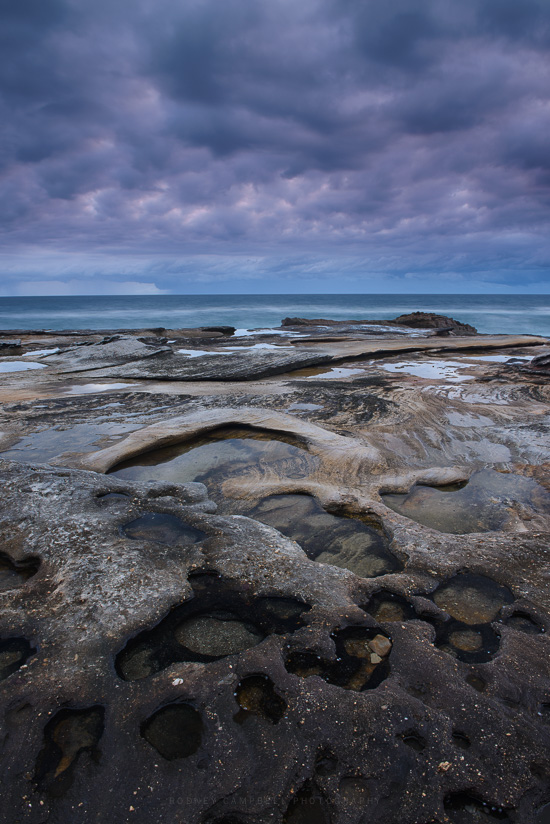
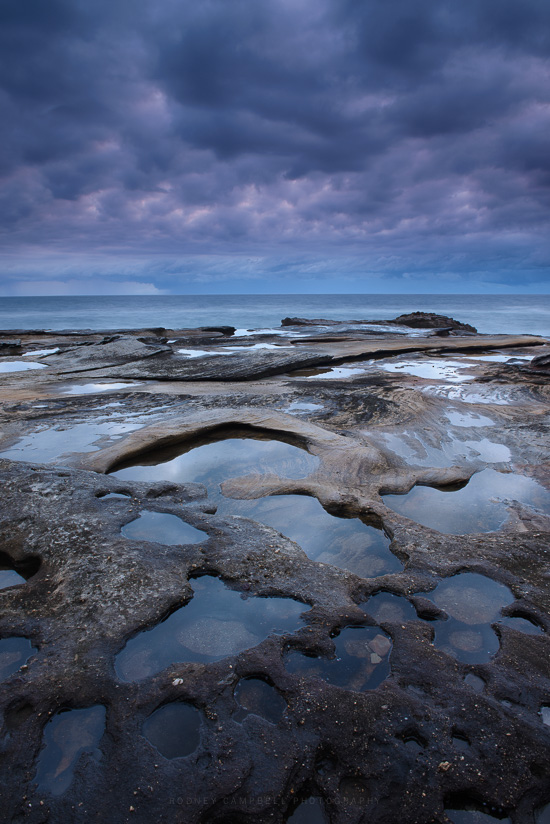
The example below is a typical use case where you have these small potholes in the rock which have pooled with water but sometimes there’s all sorts of interesting stuff under the water in the holes. Sometimes I want to use the polariser to cut through the reflections and see into the pools and the fantastic little worlds below. At other times like this where the rock is dark and moonscaped I like to have the surface of the water turn to bright varishaped smooth reflections surrounded by crunchy dark rock.
Stopping Reflections
Allowing the Mirrors
As I said – it’s about having options and using the tools to create the vision for the scene that you have in your head.
Anzac Centenary…
by Rodney Campbell on Apr.25, 2015, under Life, Photography
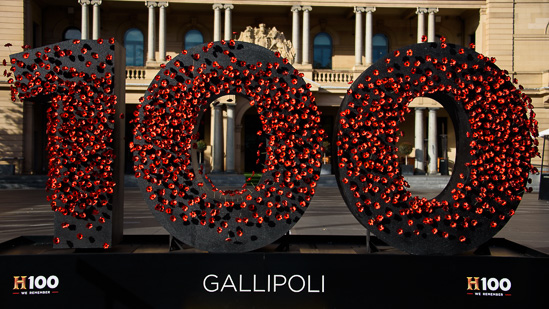
Today marks the 100th anniversary of the Gallipoli landings by the ANZAC’s (ANZAC stands for Australian and New Zealand Army Corps). On the 25th of April 1915, Australian and New Zealand soldiers formed part of the allied expedition that set out to capture Turkey’s Gallipoli Peninsula.
Anzac Day goes beyond the anniversary of the landing on Gallipoli in 1915. It is the day on which we remember Australians who served and died in all wars, conflicts, and peacekeeping operations. The spirit of Anzac, with its human qualities of courage, mateship, and sacrifice, continues to have meaning and relevance for our sense of national identity.
100 Years of ANZAC
Note: These images (especially the wider shots) look much better when larger – so click any of the images below to see larger versions in an inline overlay slideshow gallery viewer.
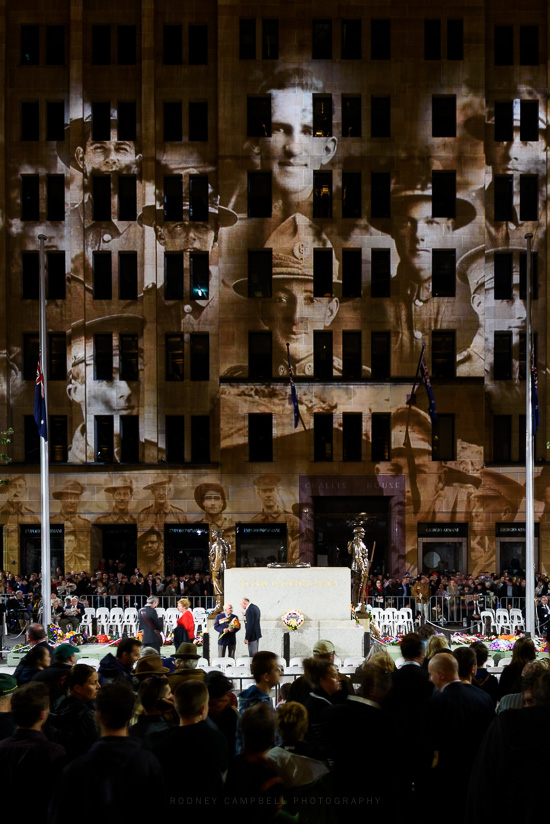
The official state Dawn Service was held at the Cenotaph in Martin Place at 4:30am, which is believed to have been the approximate time at which the first Australians waded ashore at Anzac Cove on the 25th of April 1915.
Gerry and I got up at insane o’clock this morning to head in to the city for the Dawn Service. So at 2:40AM (after a 1:45AM wakeup for me… shudder…) we met up near Martin Place. Even though the service wasn’t starting till 4:30AM it had been reported that with the massive popularity of this years event – it would be full by 3AM. They were not wrong – by the time we were in there the place was already packed with tens of thousands of attendees – easily the biggest turnout ever.
Finding a position to photograph anywhere in Martin Place let alone near the cenotaph was near impossible. Thousands had been camping out positions overnight and by this time it was easily over 30 people deep. But somehow this very nice couple allowed me to setup my tripod right in front of them to take a number of shots before moving on. They were standing right next to a row of other photographers with their tripods with a great view from the steps across Martin Place.
Faces of Anzac
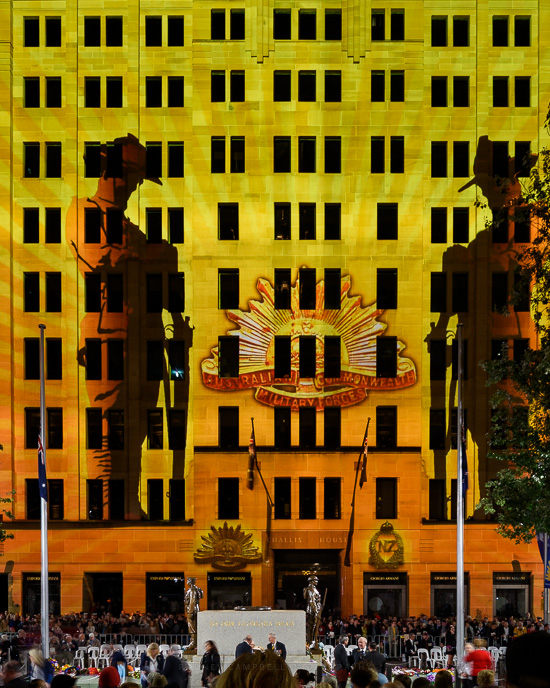
The Cenotaph
Great chatting with you both and thankyou so much for allowing me to cramp your space for a while.
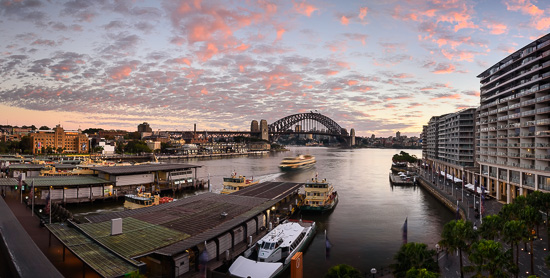
Later Gerry and I headed down to Circular Quay, The Opera House and the Cahill Expressway to shoot what turned out to be a very nice twilight and sunrise. It was looking very iffy before twilight but right on cue the clouds came in and saved the day.
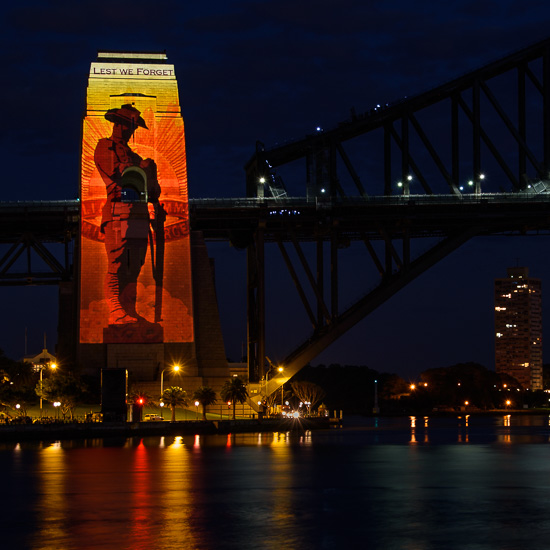
Lest We Forget
Up on the Cahill Expressway the morning turned awesome around 6:20AM (right on sunrise) and it was another chance to test out my new 28-300mm travel lens as a landscape photographers tool. Here this six frame panorama taken at 28mm is stitched in the new Adobe Lightroom CC (using the Merge to Panorama feature).
Anzac Dawn
Still Water Reflections at Bilgola…
by Rodney Campbell on Apr.24, 2015, under Life, Photography
Part two of a nice sneaky sunday morning out with friends Gerry and Deb at Bilgola Beach.
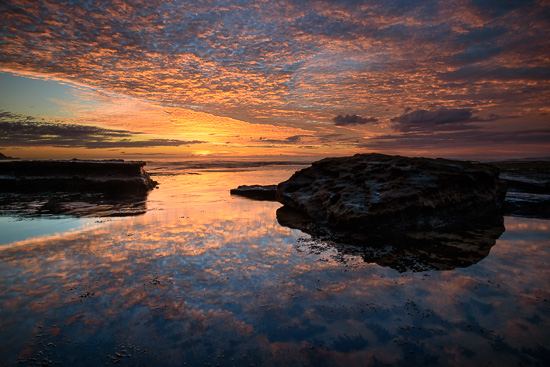
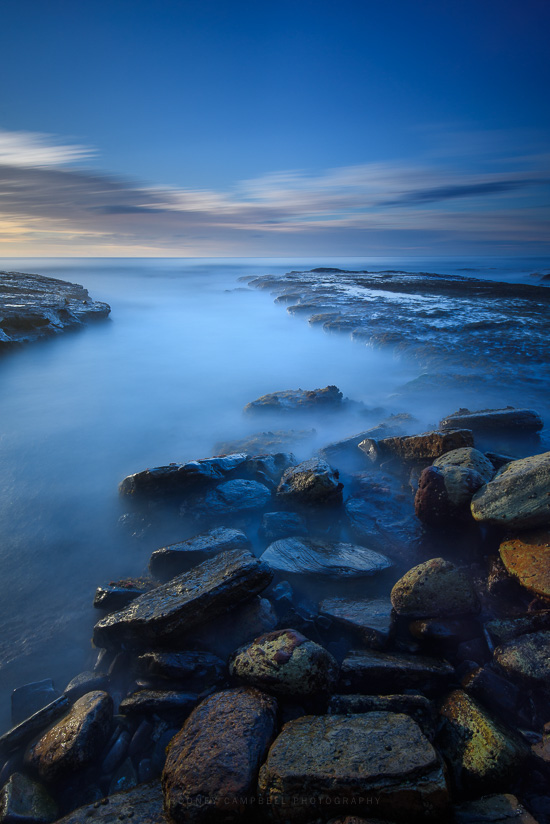
I do like still water reflections – I don’t really ever get to shoot them in the most ideal of locations – a nice perfectly still lake on a calm day. However when shooting seascapes on the coast there are a few instances where you can get somewhat closer. With a largish pool of water which stays undisturbed for small periods of time (before another large wave comes in and ripples everything :)) you can use a longer exposure to render the surface reasonably flat.
It’s not really still water but you can get someway towards the illusion of such.
Reflections of Fire
Note: These photographs (especially the wider shots) look much better when larger – so click any of the images below to see larger versions in an inline overlay slideshow gallery viewer.
One of the tricks with shots like these is to get down quite low to accentuate the size of the reflective surface.
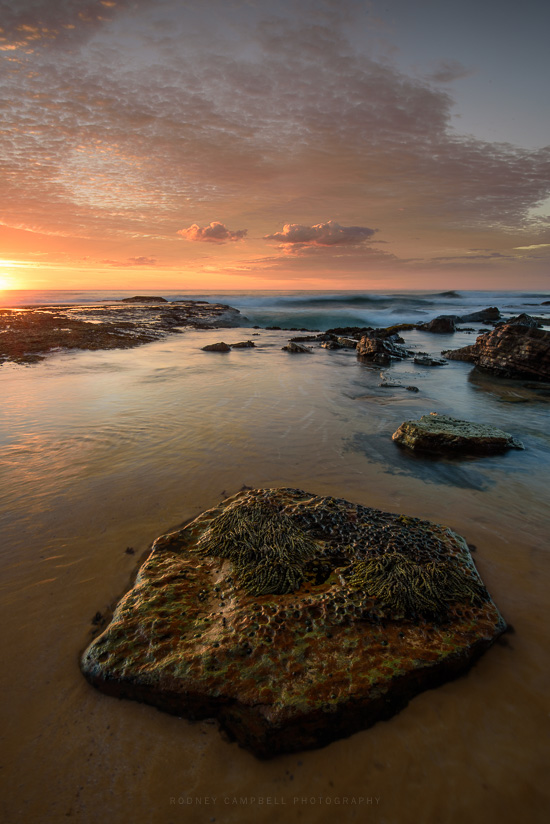
Now that the sun had risen it was time for me to seek other shot opportunities. I don’t normally like to shoot towards or include the sun itself in my frames (once it is up and visible in the sky). I find including the sun too bright and dominating as it’s pretty much what anyone will look at first in any image. Here I’ve tried to add some visual weight elsewhere by filling the whole foreground with this interesting rock covered in sea plants and having the sun right at the edge of the frame.
One
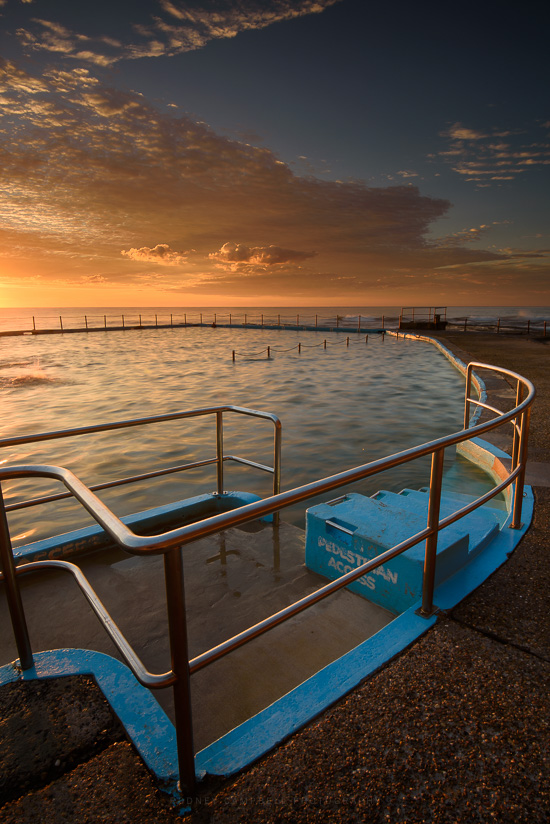
and an obligatory shot of the Bilgola pool itself, or at least part of it. Shooting away from the sun a bit but still including the colourful clouds and sky I’ve tried to compose something interesting with these nice curved railings and that strong blue edge around part of the pool. My daughter actually likes this shot best from all of the shots from this mornings session :).
Bilgola Lines
and when things get all bright and harsh it’s time to whip out the Lee BigStopper for one last frame before heading off for breakfast at nearby Newport. Note to Bilgola council – we would have stayed and eaten at the cafe right here on the beach but the expensive per hour parking starting at 6AM here was just outrageous.
Bilgola Big Blue
Autumn Colour at Mt Wilson…
by Rodney Campbell on Apr.22, 2015, under Life, Photography
Headed out for another Sneaky Sunday with Gerry and Deb to Mount Wilson in the Blue Mountains west of Sydney. It was the right time of the year again for Autumn Colour (or Fall Color for our North American friends).
I’d been here to shoot Autumn Colour once before four years ago and the colour was nicer and more consistent then from memory.
The weather forecast looked reasonably enticing – potential fog, clouds and increasing rain. We’d planned to shoot Autumn colour at Mt Wilson first up, then maybe some waterfalls and then more Autumn colour at nearby Mt Irvine.
The Avenue in Fall
Note: These photographs (especially the wider shots) look much better when larger – so click any of the images below to see larger versions in an inline overlay slideshow gallery viewer.
It was a very early start this morning – we’d planned to meetup at Mt Wilson just after sunrise (6:20AM) and it was a two (2) hour drive from home. I left my place around 4:20AM and picked Deb up at 4:30AM. Gerry had arrived just before us when we arrived in the main st (aptly named The Avenue”) of Mt Wilson. We moved our cars off into one of the side streets so the street would be clear and set to look for some shots.
At 6:30AM I started with a sequence of shots for a stitched panorama standing in the middle of the main street. It’s one of those things you can do when you’re here early enough… Stand in the middle of the road taking numerous shots without being run down :). Something we used to our advantage for the next hour or so.
To be honest we were expecting things to be better, the promised clouds (and fog) were nowhere to be found and the tree’s on one side of the road were essentially already bare (likely rain had smashed the leaves off) and on the other side of the road the colour in the leaves hadn’t fully developed yet. Not just here on this main street part of The Avenue but also on the roads coming into town.
Still it was a pretty enough scene, and one not normally seen here in Australia so it was ready for all the cliche shots of The Avenue in Fall.
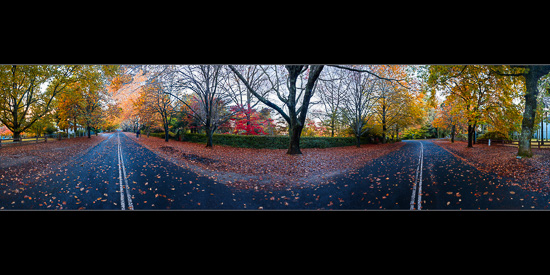
This is the stitched pano I took when I first arrived. Eleven (11) vertical frames taken with the 24-70 at 24mm. I didn’t bother bracketing these shots basically because I didn’t think much of the composition or the conditions. Still it stitched fine and it does give you a good view of what the main street of Mt Wilson looks like. You can see here what I meant by the bare trees on one side – right here in front of me in the middle of the frame. You can however see a few very nice looking and very red trees in peoples gardens along the street.
Mt Wilson in Autumn
I decided to leave Gerry in the shot (he’s just on the right side of the road heading off to the left) instead of cloning him out…
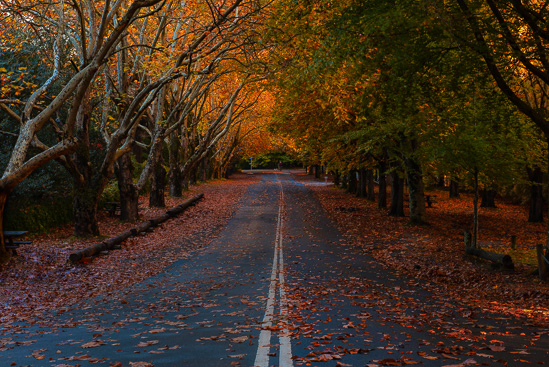
I think the first image up top is probably the best of the shots from this early part – taken at 6:50AM and using a longer focal length (70mm) to look down The Avenue from the end of the street. At this time the cars havn’t destroyed all the leaves on the road and there’s no vehicles in the street plus the sun has just risen behind me on my right so it’s early golden rays were just streaming across the landscape.
I’ve got to admit upfront that I’ve had to “help” this shot in post…
I took a bracketed set of frames – 5 shots at 1EV intervals (-4, -3, -2, -1 and 0EV) and merged them in post.
I’ve then adjusted the result using Adobe Camera Raw (the same processing engine as used in the Develop Module in Lightroom). In ACR I’ve done a few things like adding some Contrast, Clarity, Vibrance and Saturation and then in the HSL section I’ve adjusted the balance of the Reds, Oranges and Yellows to bring them out a little more.
I’ve then duplicated the layer and then used a little trick I’d previously seen online to boost the feeling of Fall Colour. First convert the image to LAB colour and then use Apply Image and in the dialog box choose “b” from “Channel” and for “Blending” choose “Soft Light” or in my case for a more dramatic look “Overlay”, and adjust the Opacity to taste (I used 40% for my image). After clicking OK I then converted back to RGB colour space and then adjusted the Opacity of this layer and the original underlying layer to taste. Also with a layer mask over the Autumn Colour enhanced layer I was able to paint back in parts of the original version where things had gone too wild for me.
Back in Lightroom I gave it my usual finishing touches and voila here we have The Avenue in Fall (not quite as it appeared on the day but perhaps a little more how we wished it would have been)…
By now other photographers had arrived for their chance at Autumn Colour glory so we headed out of town a little to try our luck on some of the roads leading into town.
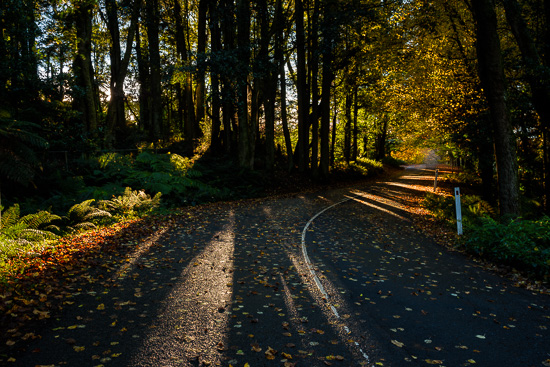
This is still on The Avenue outside of and looking back towards town. I loved the play of low sunlight coming through the trees and being early still (twenty past seven and just an hour after sunrise) the roads were still pretty quiet so I could get down low on the road and play with a few compositions. As is the case with many of my shots I end up liking the very first composition best in the end… so I didn’t need to have leant over and put my hand right into a stinging nettle (sort of like poison ivy for our North American friends) on the side of the road :(.
This image is a merge (manually blended using layers in photoshop) of three exposures (-3EV, -2EV and -1EV). I reckon I could easily have processed the single -1EV frame to end up with this result but again I was experimenting with processing technique and in this case the use of luminosity masked layer blending.
I actually originally tried a 32bit HDR blend of all five frames (-4, -3, -2, -1 and 0EV) but the end result was meh, perhaps even bleh…
Sweep of Autumn
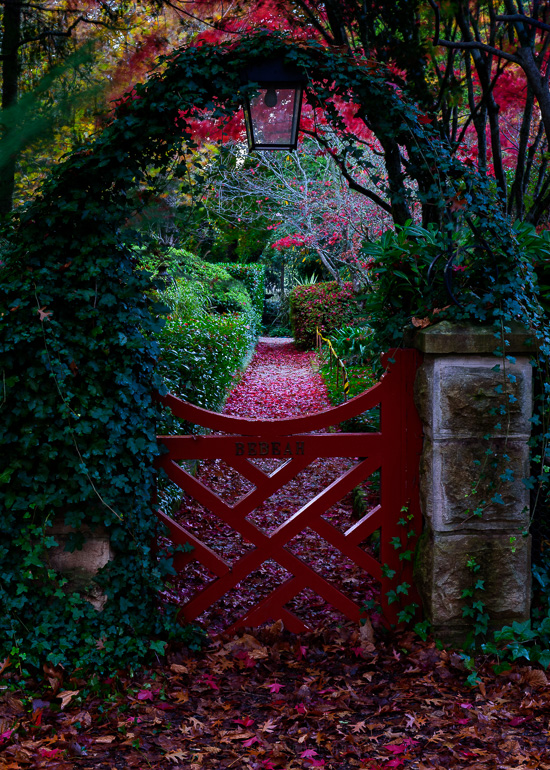
Some of the best colour about wasn’t along the main streets but rather in the gardens of the people living in Mt Wilson. For example this little pathway into a property off the main street…
The Red Gate
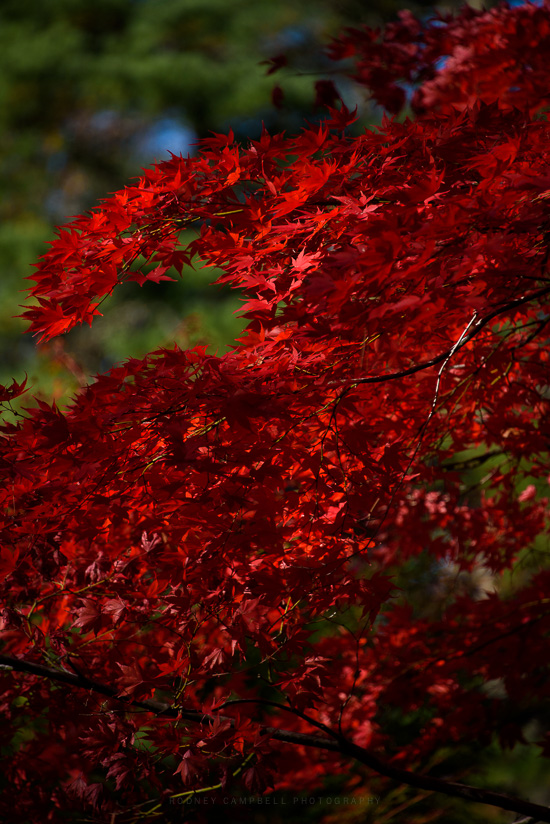
and amazing red Japanese maples like this…
Flashes of Red
The shot above was also an opportunity for me to try my first shots with a new lens I’d just acquired for my trip away in the middle of the year. I needed a lens which had a reasonable focal length that I could use as a walk around lens for weeks but which could also replace the use of my 70-300mm lens for a travelling long lens. It would also needed to be used with filters on landscapes if needed (and if I was to somehow damage or loose my primary landscaping lenses – the 16-35/4 and 24-70/2.8 – it would be my backup).
This one was pretty much as is straight out of camera so I’m pretty happy with the rendition from the lens (at it’s maximum 300mm focal length no less) so far.
