Archive for November, 2015
Freshwater Queasy…
by Rodney Campbell on Nov.30, 2015, under Life, Photography
Some time ago… OK exactly one year ago on November 30th last year!… Gerry and I had arranged a sunrise shoot at Freshwater tidal pool.
Freshwater is one of Sydney’s northern beaches – it’s just north of famous Manly beach and the tidal pool is on the rocks at the northern end of Freshwater beach.
Gerry was keen to shoot this location on this particular day because the sun would rise directly in line with the side of the pool.
Unfortunately at this time of the year sunrise is at about the earliest it gets – 5:37AM. Whilst I was driving there I also got the message from Gerry that he wouldn’t be able to make it (one of the few times – if ever – that he’s piked on me). He’d been up all night with a very sick child and was fully expecting if he was there this morning he’d be filling the pool with chunks – not a pretty sight…
I was on the rocks and shooting at an ungodly 4:40AM and well the clouds were pretty much zilch. There was very strong orange lighting over the pool area so shooting there was a no go before the lights went out or sunrise. I tried some long exposures on the rocks but nothing took my fancy. I thought the morning was bust…
About twenty minutes to sunrise the pool lights went out and I figured I’d climb over the railing down into the ocean beside the pool and try my luck there.
Sunrise Point
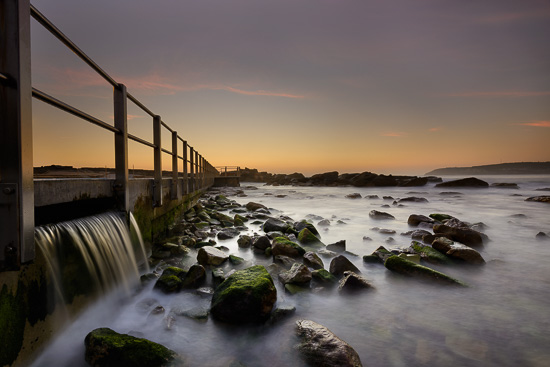
Sometimes you just have to get wet to get a half decent composition or subject. Here I’m wading around at around knee deep in water over precarious slippery looking rocks. Thankfully in this more sheltered part of the bay the waves are very small so no chance of being swamped.
Facing along the side of the pool towards where the sun would soon rise (ten minutes to go). This is a manual layer blend of three exposures in photoshop. We were just starting to get tiny touches of high whispy cloud which was hinting pinks tho the colour really didn’t last very long and the clouds weren’t coming in fast enough.
Note: These photographs (especially the wider shots) look much better when larger – so click any of the images below to see larger versions in an inline overlay slideshow gallery viewer.
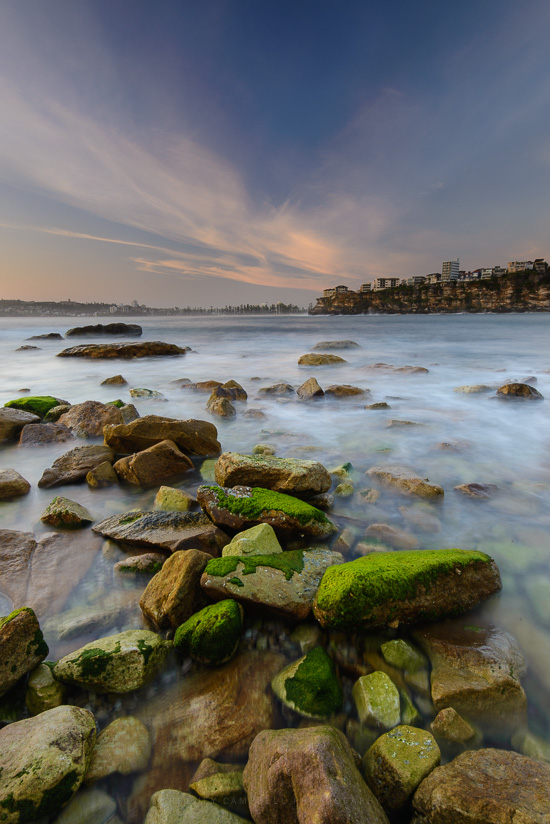
Just after sunrise I’m swivelling to my right since the clouds were coming in from over there and frankly it was looking more promising. Plus there were all these very fab nuclear green mossy rocks strewn about near this outflow from the pool. Hmmm “outflow”, nuclear green, coincidence?… lets not go there….
Angels Wings
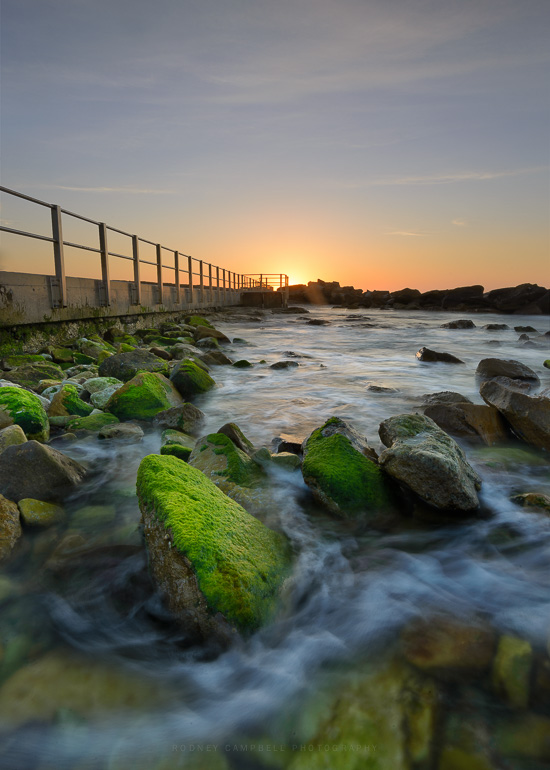
Unfortunately at the eastern seaside end of the pool there’s a large stretch of rock reaching into Queenscliff Bay which encompasses Freshwater Beach. This blocks a view out to sea from this low angle and also the chance for a nice clean horizon line. It was a couple minutes after sunrise before the sun actually started breaching this wall of rock. Time to swivel back around and down the length of the pool wall.
This is another manual layer blend of four images – essentially one underexposed for the sky and three similar exposures for various parts of the foreground with different water movement and visibility.
Freshwater Green
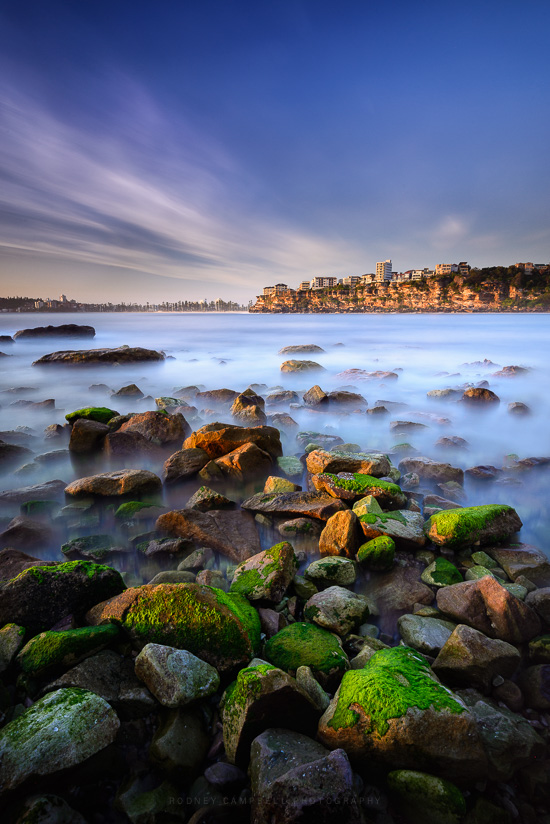
Around twenty minutes after sunrise and it’s time to get out the heavy ND filters. This one with the Lee LittleStopper ended up being the pick…
The view over some more nicely placed green rocks across the bay towards Queenscliff head and Manly beach just to it’s left in the middle.
Sharp and Smooth
Afterwards I took a walk along the coast to Freshwater Beach itself to recce the area for potential future shoots (there’s these twin outflow popes there which showed potential on Google Maps). However uninspired I took one shot with the BigStopper and was done.
I’m not sure you missed all that much this morning Gerry – it did take me five months to actually get around to processing the images :)…
Impossible Reflections…
by Rodney Campbell on Nov.29, 2015, under Life, Photography
My daughter and I now needed to make our way out of Dales Gorge before it got dark. The climb out would be near impossible in the dark and we had to go the long way to get out. It was still light now but we were still possibly an hour a way from getting out and it was almost 5PM already with sunset at 5:38PM today.
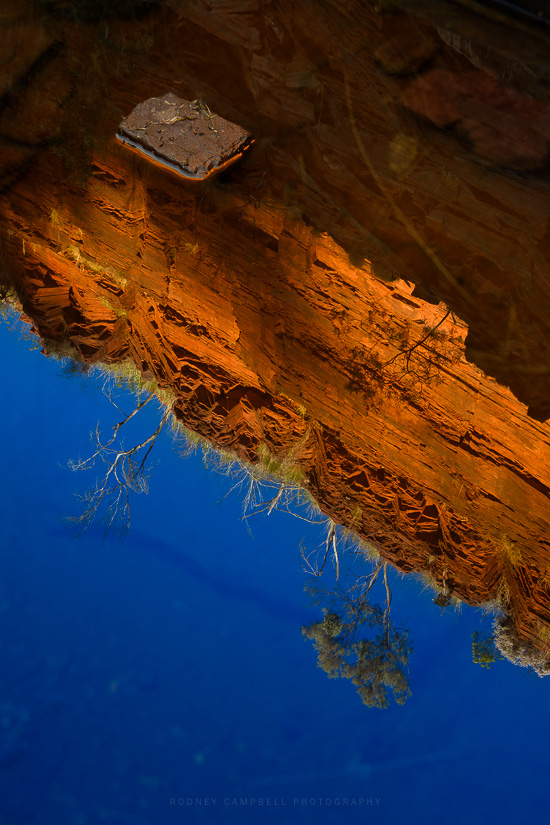
With the sun now quite low and just hitting the top parts of these deep cavernous gorge walls with a softening light the colours of both the real and these impossible reflections were magical. How could I not linger and take a few more photographs before leaving :).
Impossible Reflections
The above image is a blend of four images on layers in Photoshop. I’ve used different frames for blending both exposure differences (the very bright and dark areas of the frame) and also for focus stacking reasons. This somewhat confusing image is taken looking down into the still water and showing the reflection of the sky and gorge walls above. However that small rectangle rock in the upper left quadrant is in the water itself and thus at a vastly different focal plane to the rest of the image.
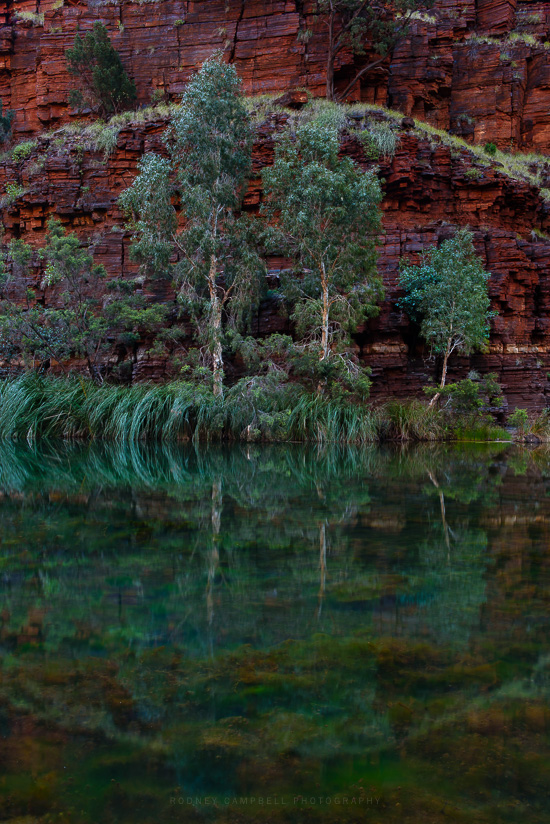
More beautiful colours and reflections in the very late afternoon light being reflected quietly down into the base of the gorge.
Leaves and Stone
After 5PM now and we really must get a wriggle on – we still have to make it back to the steps going up and make that painstaking climb out of the gorge. I think we made it to the top just a bit after sunset – phew – and only half an hour or so late :).
Fern Pool – Karijini…
by Rodney Campbell on Nov.28, 2015, under Life, Photography
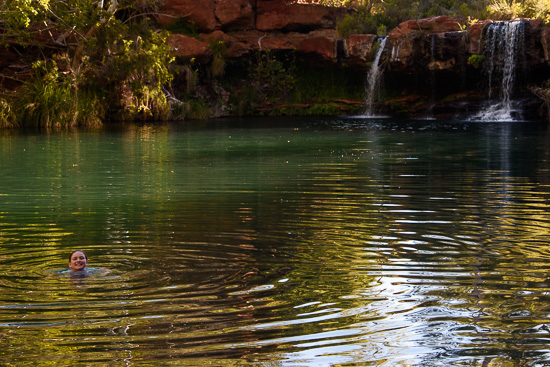
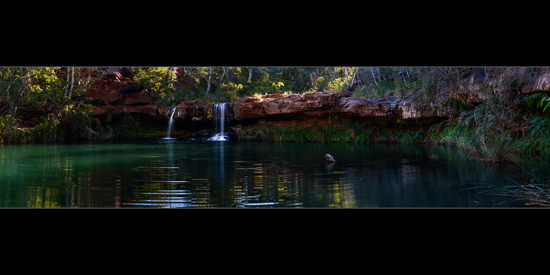
Not far (perhaps only 200m) upstream from Fortescue Falls is the beautiful Fern Pool. Here you can have a refreshing swim in the spring fed permanent falls. You feel like you’re in a tropical paradise at this pool surrounded by ferns and trees. Park managers have erected a wooden swimming platform with stairs, so water access is easy.
It was now almost 4PM and my daughter and I changed into our swimmers and took a dip in those very inviting – but VERY cold – waters.
Golden Fern
Note: These photographs (especially the wider shots) look much better when larger – so click any of the images below to see larger versions in an inline overlay slideshow gallery viewer.
This is a stitched panorama of nine (9) vertical frames taken at a tight 105mm. Because of the very strong contrast in the scene – parts were in full sunlight and parts in full shade – I shot HDR brackets for each of the panorama frames.
In the end I have nine sets of five (5) bracketed frames taken at 1EV intervals from -2 and 2/3EV to +1 and 1/3EV. I then processed each of the sets of five frames into a single 32bit image using Lightroom’s Photo Merge to HDR feature. I didn’t post process any of those frames but then stitched those nine HDR frames into a panorama again using Lightroom’s Photo Merge to Panorama feature. I then processed the final 32bit DNG in Lightroom.
Fern Pool
The end result would definitely have been better had I shot it at a better time of day (when the whole area was under open shade – for example near sunrise/sunset/twilight). I’m still happy with this result and it gives a pretty accurate representation of what it was like. How lush and green and inviting it was.
Fortescue Falls…
by Rodney Campbell on Nov.26, 2015, under Life, Photography
After winding our way along the base of the gorge we eventually made it to the base of Fortescue Falls.
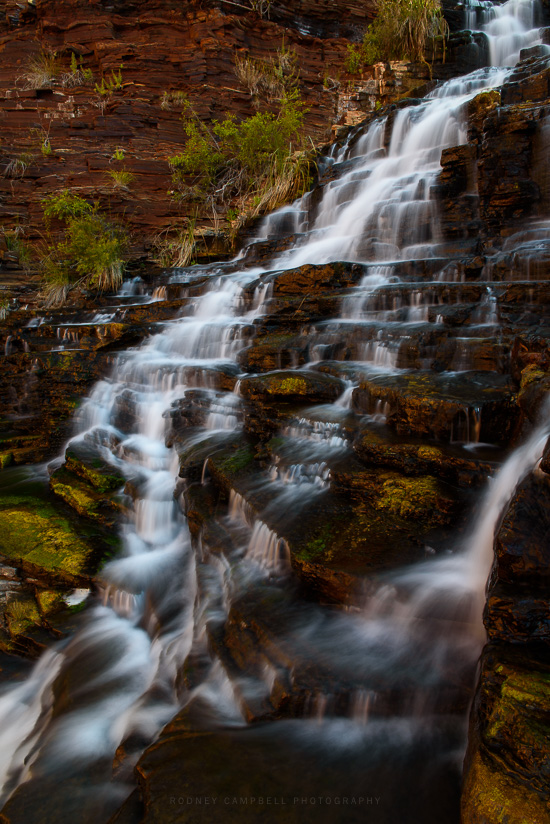
Thankfully the majority of the falls themselves were in shade by the time we arrived there (3:20PM). This made it much easier to get some nice shots of the water flow in the falls. Here is a smaller section around the middle of the falls.
Fortescue Flow
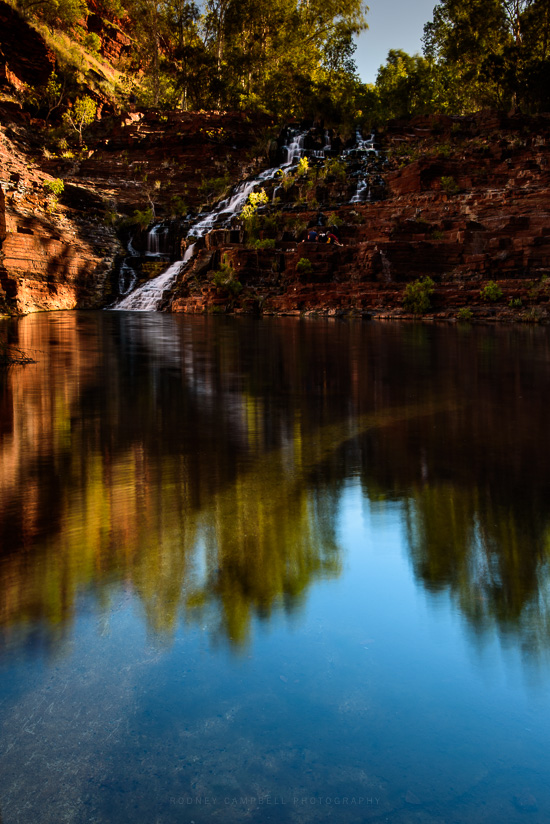
This oasis in the middle of the remote and unforgiving region of the Pilbara is beautiful and tranquil with it’s deep green waters surrounded by lush green vegetation and red rock walls. The waterfall actually flows year round so even here during the dry season it’s a fantastic spot for a refreshing swim.
There were visitors everywhere on the falls so getting a shot of the falls without people swimming, lounging or walking on the rocks wasn’t likely. With so many people around I opted to move on fairly quickly. Thinking we might get a chance to get back here at a later stage and spend some serious time exploring the area to take some photos. Silly me :).
Fortescue Falls
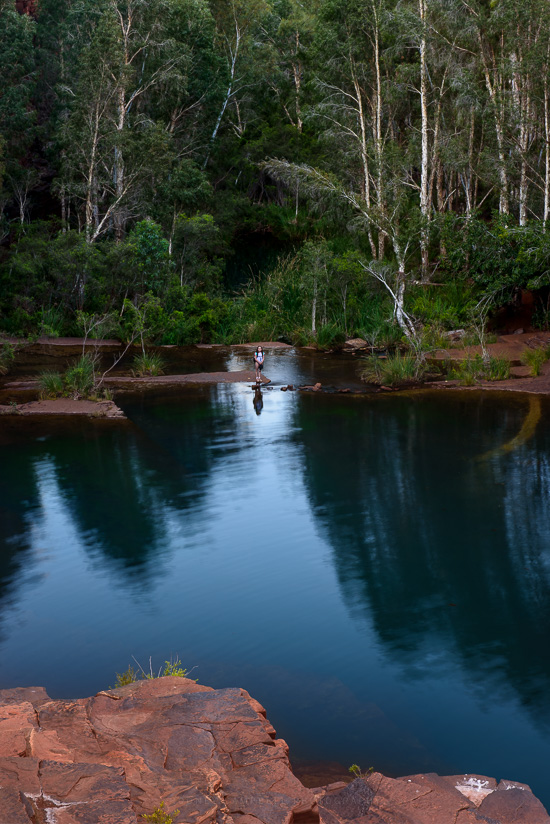
This is the view (on our way back out) looking from the top of Fortescue Falls back down the gorge towards all those fantastic paperbark trees at the base of the gorge. That’s my daughter waiting patiently down below (form me to both take the photo and then climb down there to join her :)).
Stand Tall
We headed further upstream towards Fern Pool and our destination for a swim on this hot afternoon.
Aurora HDR Pro First Look…
by Rodney Campbell on Nov.25, 2015, under Life, Photography, Technology
There’s a new entrant in the HDR (High Dynamic Range) software package space called Aurora HDR from the maker of a suite of excellent photography software products for Mac computers macphun.
Aurora HDR is a joint project between Macphun and the worlds most renowned HDR photographer Trey Ratcliff.
It works as a standalone application and as a plug-in to Adobe Photoshop, Adobe Lightroom and Apple Aperture.
Full Disclosure: My copy of the software was provided for free – I’m also using the Pro version of the software. I’ll still tell you exactly what I think but I thought you should know in advance.
I’m also a landscape photographer with a particular passion for seascapes, long exposure and night photography. For the later two the use of HDR techniques are rarely if ever needed, and for my landscape work I don’t find I can get acceptable results using HDR (or rather tone mapping) tools. I much prefer either using filters in the field or exposure blending techniques (using layers and manually painted or luminosity masks).
So in that regard I don’t find I use HDR software all that often.
I do however find it a very useful tool when shooting architecture, especially indoor architecture. Where that enhanced detail and gritty look can often provide that additional level of interest to the image in addition to the contrast and extended dynamic range control. In particular I find it very useful when creating monochrome architectural work.
History
In the past I’d traditionally used either Photomatix Pro or Google/Nik HDR Efex Pro as my HDR software tool of choice. As I mentioned I’d never really liked what those packages did to images of the natural world (landscapes, seascapes, etc). When I did use them I tended to only make use of the “natural” presets as starting points and work from there.
More recently I’d switched to using them just to create the base 32bit HDR file (without any tone mapping) which I’d then bring back into Lightroom for my normal RAW post processing workflow. This would allow me to process the image with tools I was very familiar with just with a data file with much more dynamic range and data available to play with.
When Lightroom 6 was released with it’s new Photo Merge to HDR feature built in I switched to that as a quick and easy method for creating those 32bit RAW files for editing. The advantage was that this was a simple one step process and there were basically no controls (other than Auto Align (which I enable), Auto Tone which I basically never use and some very simple Deghosting controls (which is probably the weak area of this software)).
Back Story
I’d recently visited a lighthouse on the south coast of NSW here in Australia and had the opportunity to spend time inside with my tripod and Samyang 14mm ultra wide prime. With a dark central interior with small rectangular windows to the bright outside world scattered around the rounded interior it was a typical scenario for dealing with very large contrast differences.
I took a number of bracketed sequences with my Nikon D750 using 5, 7 or 9 auto brackets (spaced at 1EV intervals).
So when the chance to use a new HDR software suite came up I figured I’d run some images through and compare the results.
Note: This is based on Version 1.01 which is the current version of the software at this time.
Comparisons
For the following comparisons I’m editing the same images in at least three ways.
I firstly pre-process the source frames (5, 7 or 9 shots) with a few simple settings in Lightroom (e.g. Remove Chromatic Aberrations, White Balance, Highlight Recovery, etc).
– I then use Lightroom’s Photo Merge to HDR feature to create a 32bit DNG file and then edit that file in Lightroom using my “normal” post processing workflow
– As a reference I take a single D750 RAW file (typically the -1EV frame) and editing just that single frame in Lightroom using my “normal” post processing workflow (in some cases I just copy all the above workflow minus the overall Exposure adjustment to this file)
– I use the Aurora HDR Pro Lightroom export preset to feed the bracketed source frames into the plugin and process
Aurora HDR
I havn’t had enough time to give a detailed analysis of the features of Aurora HDR Pro however I’ll give you my thoughts and impressions so far.
The user interface is very pleasing and has that very familiar look and feel to anyone who uses software like Adobe Lightroom with it’s column of control sliders on the right. The layout is sensibly organised though in the pro version at least the number of available options is staggering and somewhat overwhelming.
It does however have a number of advanced options you won’t find in any other HDR software packages including the use of Layers (including Blend modes), Masking and built in Luminosity Mask.
The package comes with a number of built in presets along with a number supplied by Trey. I like most people find presets to be a useful means of seeing what end result options might be possible and then finding a good starting point and working from there.
In this instance I found that almost all the preset options were (in my humble opinion) too over the top HDRy. Even the so called “realistic” options were not very realistic to my eye and had too much of that eye popping saturation, crunchiness or inverted light that appears to be so prevalent.
The sliders in the software however do give you ultimate control so with practice and refinement I’m sure you can produce images which will look like you want them to. With as much or as little of that HDR look as you desire.
One thing I really like in this software is that the resulting image updates in real time with the movement of the sliders. This is one aspect of say Photomatix Pro which was annoying in that the image didn’t update till after the slider was moved and let go.
Samples
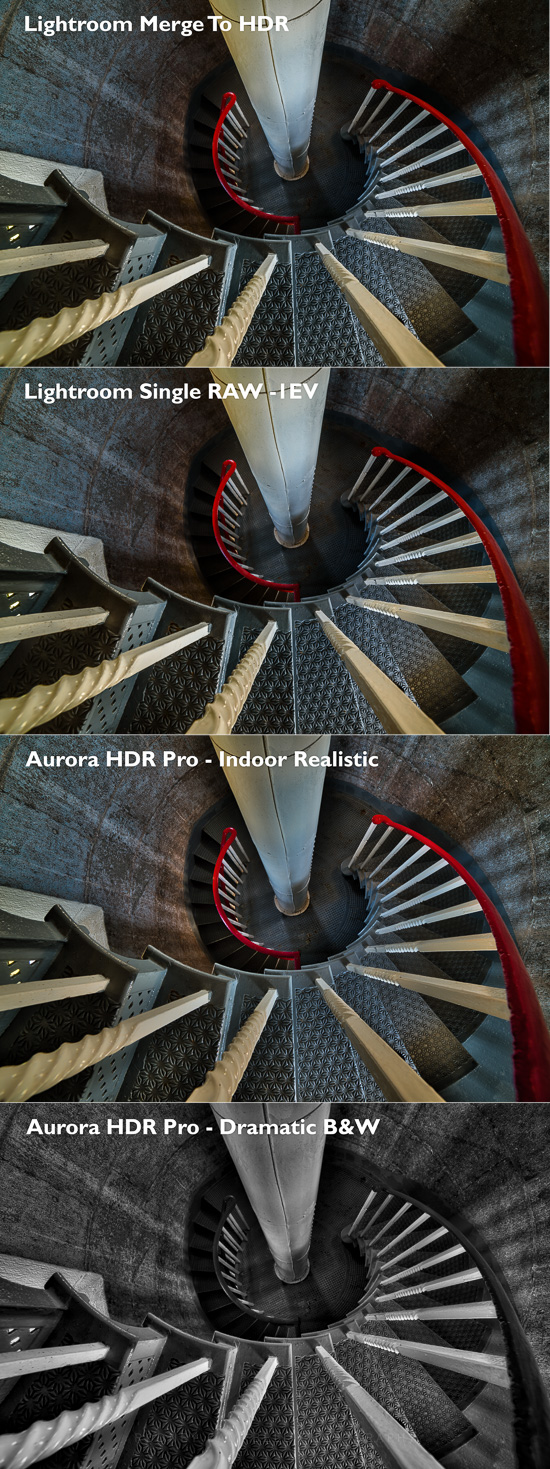
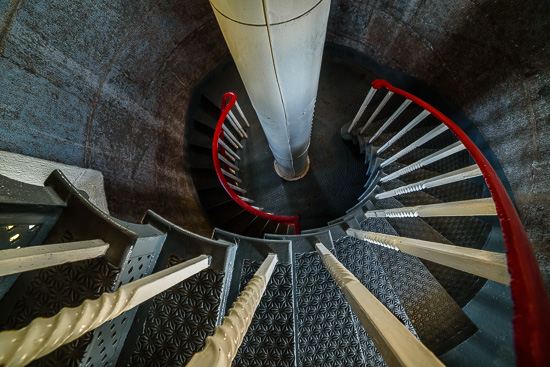
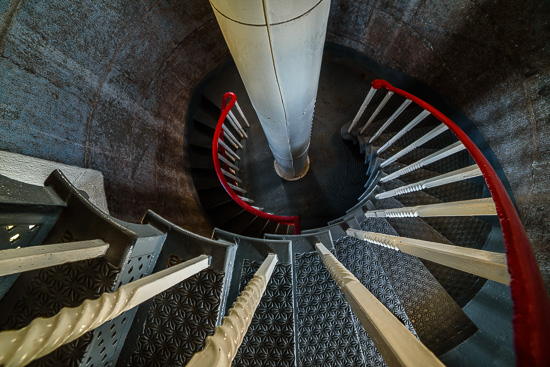
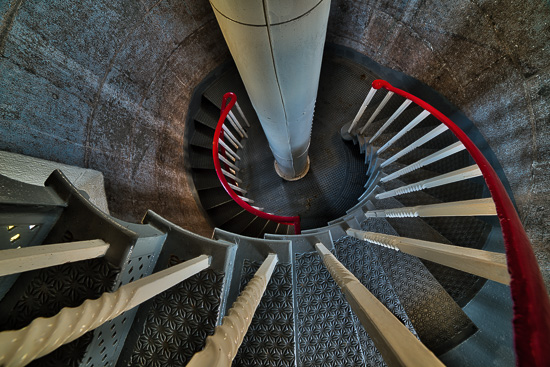
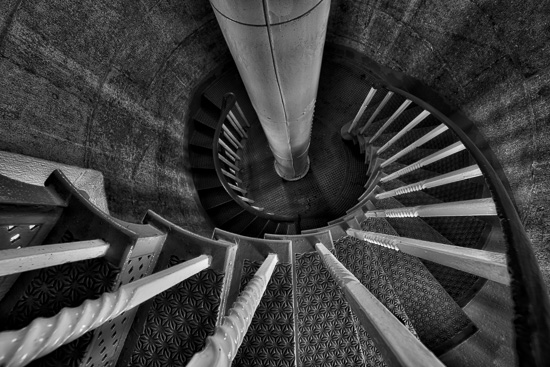
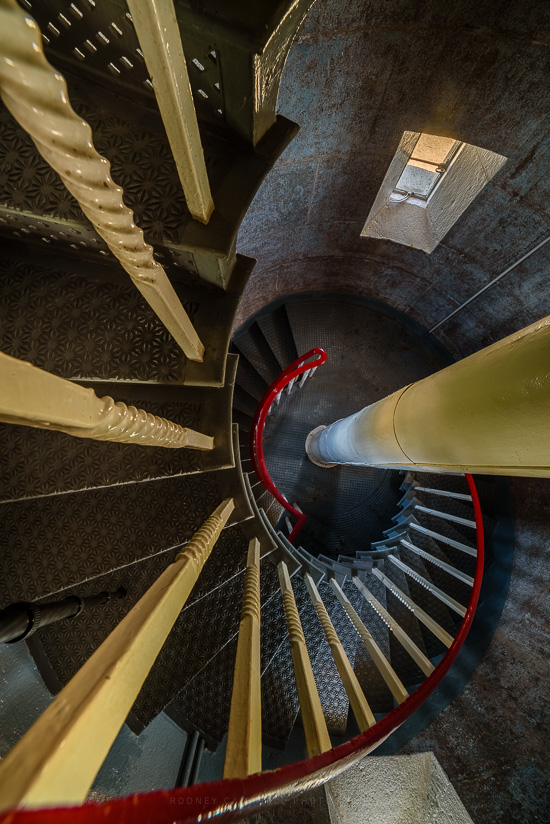
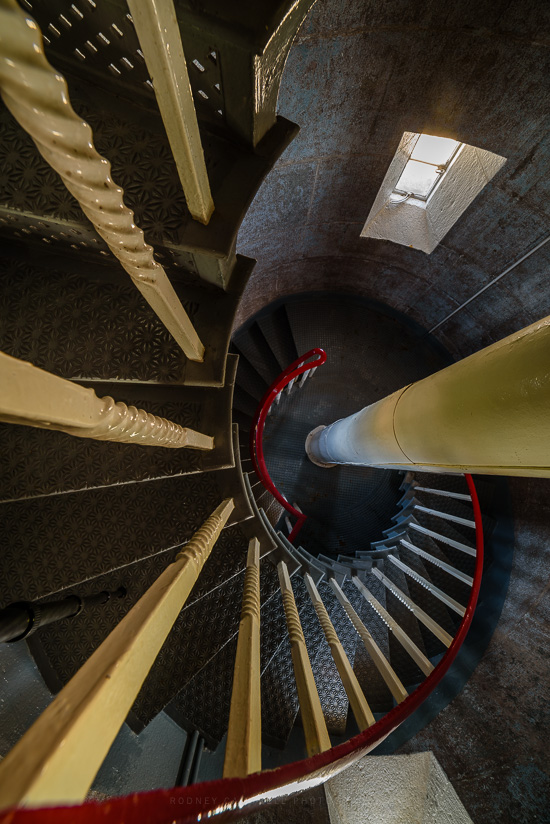
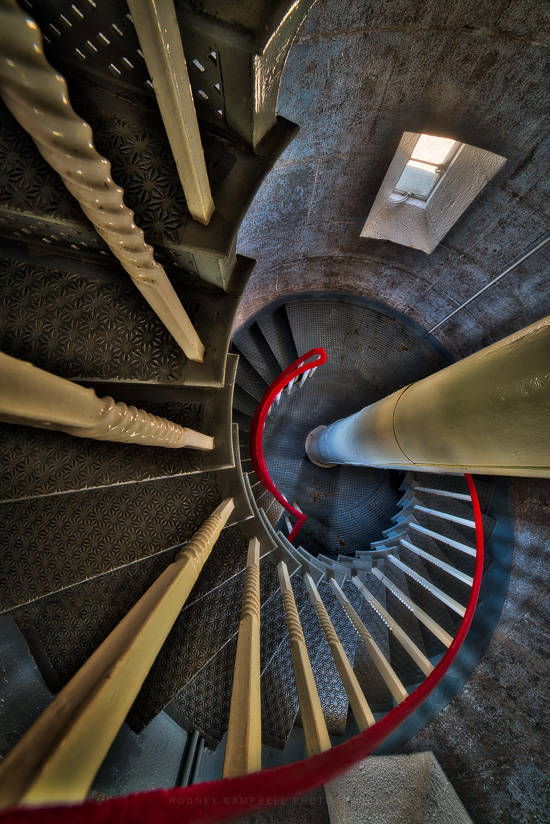
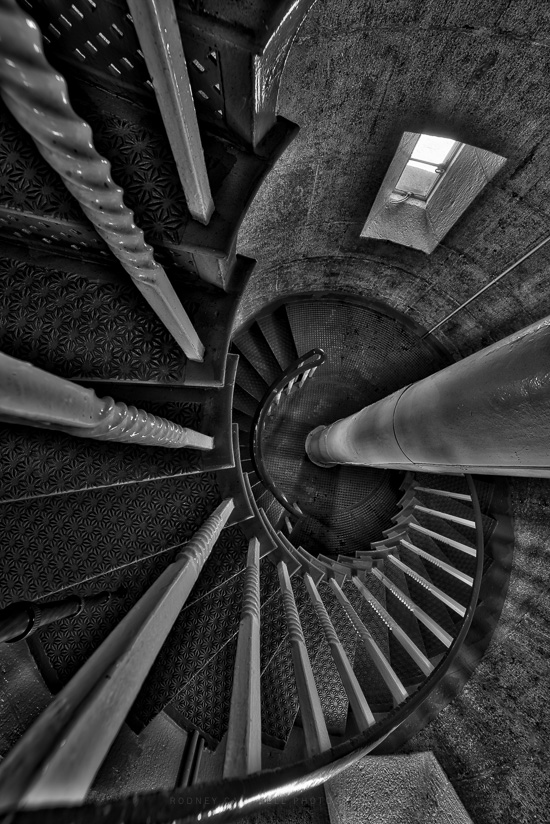
With this first sample I’ve performed the four processing’s of the image. The source data is nine bracketed frames taken from -7EV to +1EV.
The top image is a Lightroom Merge to 32bit HDR and then processed in Lightroom version.
The second has exactly the same Lightroom processing as the first (minus the overall Exposure adjustment) applied to just the single -1EV frame. What is remarkable here is the dynamic range retained by the D750. The resulting image is very nearly identical to the 32bit HDR merge (which has slightly better shadow detail).
The third is tone mapped in Aurora HDR Pro using the Indoor Realistic preset as the starting point and then with some tweaking of the sliders.
Finally the fourth version is also tone mapped in Aurora HDR Pro using the Dramatic B&W preset as the starting point and then with some tweaking of the sliders.
Note: These photographs (especially the wider shots) look much better when larger – so click any of the images below to see larger versions in an inline overlay slideshow gallery viewer.
Lightroom Merge To HDR
Lightroom Single RAW -1EV
Aurora HDR Pro – Indoor Realistic
Aurora HDR Pro – Dramatic B&W
Sample 2
As above the source data for the images below is nine bracketed frames taken from -7EV to +1EV and I’ve performed the same four processing’s of the image.
Lightroom Merge To HDR
In this instance the 32bit HDR has recovered much more detail from the blown out window. Those -7 to -5 frames proving much more useful here. Moreso than even Aurora HDR was able to pull from the window (with my processing settings).
Lightroom Single RAW -1EV
Aurora HDR Pro – Indoor Realistic
In the Aurora HDR Pro versions the presence of some unnatural haloing around high contrast boundaries is present. For example that strange darker shadowing around the window area and the central pole. Likewise the lighter halo just beneath the stairs (esp the second stair) at the top left. We also have that telltale HDR “dirtiness” that can sometimes occur – for example on the top of the twisted rails on the left side – esp that one coming up into the bottom left corner.
This would likely be a scenario where ideally you would layer in some of the original frames and blend in some of those images into selective areas to remove any problem areas.
Aurora HDR Pro – Dramatic B&W
I’ve not yet had a thorough play with the extremely extensive options and features available in the software. When I have had a chance to become much more familiar and have had some time to make use of them I’ll post a follow up article on my experiences.
