A Practical Use of Polarisers in Landscape Photography…
by Rodney Campbell on Apr.27, 2015, under Life, Photography
A Circular Polariser (or Polarizer for our North American friends) is one of those few filters which is an almost essential piece of kit for any landscape photographer. It’s one of the few physical filters which can’t be replicated in post processing (e.g. in Photoshop).
There are numerous articles online which will go into the technical aspects of how Polarisers work. However for the purposes of this article I mostly want to provide some concrete examples of why they might be useful to a landscape (or in this case seascape) photographer.
Most people know of some of the simplistic effects of a polariser – like making blue skies bluer. However they also have many other useful effects like being able to cut through reflections (on reflective surfaces like water, glass, chrome and so on), reducing the glare off shiny objects (like wet rocks, leaves and so on) and also helping to improve contrast and saturation in images. One other sometimes useful benefit is that the circular polariser can also provide an easy one to two stop neutral density effect to slightly increase exposure times when needed.
Circular polarising filters can be rotated to maximise or minimise admission of polarised light. Rotating the polarising filter will make polarised light stand out or nearly disappear depending on how much of the light is polarised and the angle of polarisation.
I’d intended on holding an online discussion with my Arcanum mastery cohort to explain this topic of circular polarisers and their practical use in landscape (or in this case seascape) photography. So whilst I was out shooting one morning I shot some test frames to highlight in my discussions.
In each of these cases I’ve framed a composition I like and setup all the other parameters (camera, lens, filters and other gear along with camera settings) for shooting the scene as I normally would. However in each case I’ve taken a few shots (with exactly the same framing, etc) with the only adjustment being rotating the circular polariser to adjust the level of polarisation of the scene.
The day was very overcast and it was pre dawn so the light was much more even and scattered than you would find on a clear day however even in these conditions the polariser can be used to great effect.
Note – I’m not specifically advocating that the choice of one polariser setting is necessarily better or worse than another. The aim here is not to pick a winner but to understand that there are options. The main point I am emphasising here is that using a polariser AND adjusting it’s settings “can” make a dramatic difference to the end result and you may as the photographer prefer one look over another and it is your choice to select as you see fit.
These images are essentially straight out of camera with a slight boost in the RAW processor to remove the dullness (akin to selecting the Landscape JPEG preset in camera) and some other slight adjustments to equalise the overall exposure between images.
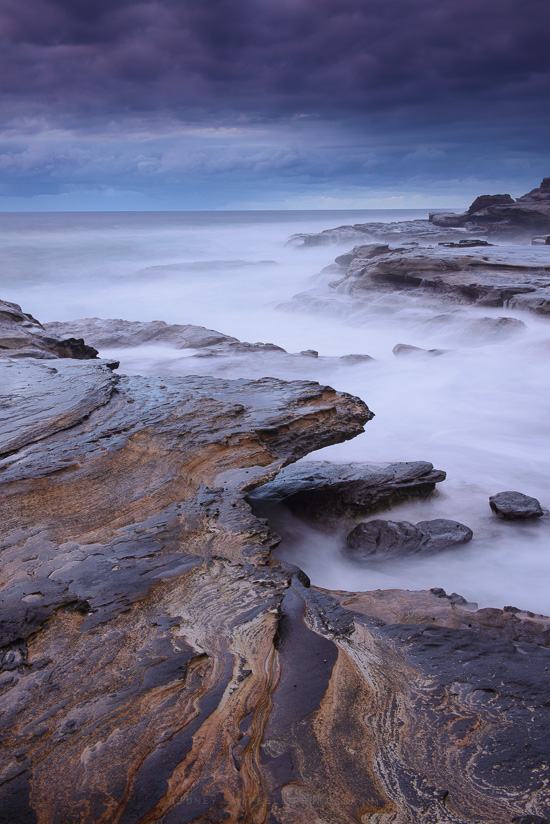
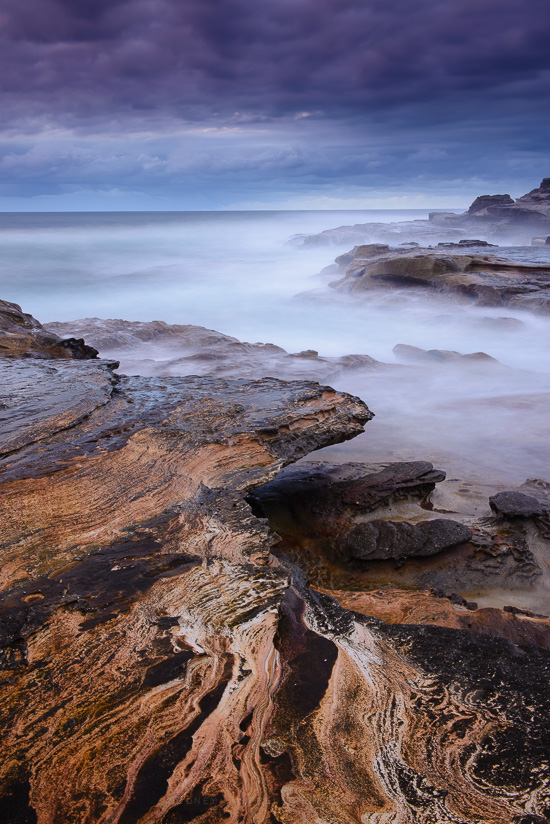
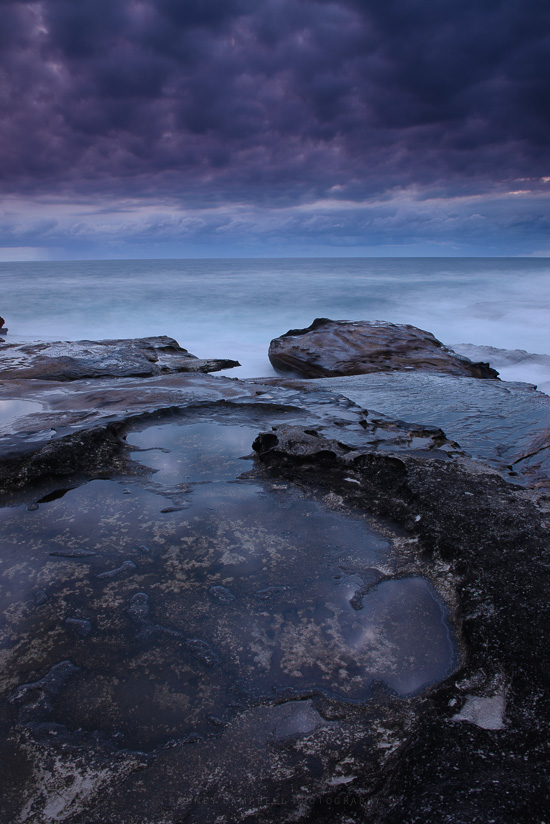
In this first example we first show the scene with the polariser set to do very little – i.e. we have a lot of haziness and glare off the thin film of water over all of the wet rocks. Then the polariser is rotated to set it to cut through as much of the reflected glare as I could – this allows you to see through to the colourful wet rock beneath. Another typical use case just like this is when photographing waterfalls – when you want the falling white water to appear against nice dark wet rock behind and not a wall of hazy white contrast sapping reflective rock.
Thin Film Reflection on Rocks
Cutting Through
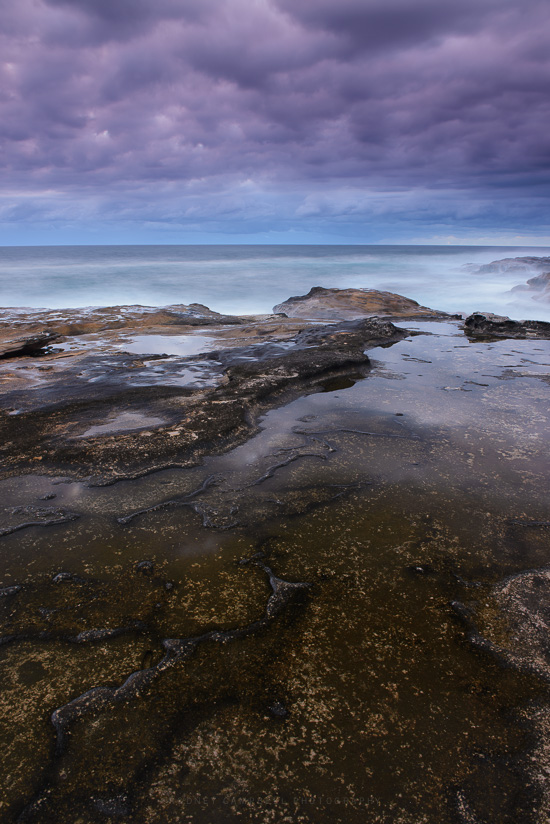
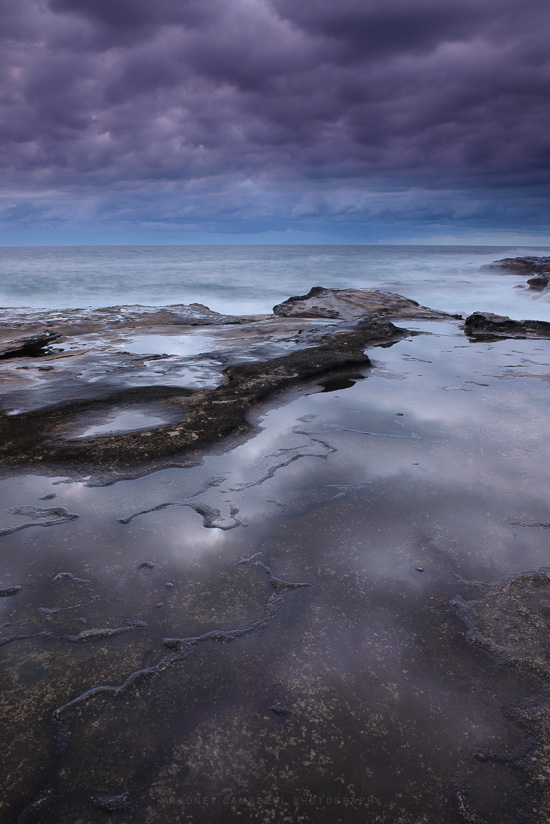
In this next set of three images we have a rock shelf where the rocks are all wet with sea spray and waves and I’ve composed a shot to include a largish shallow pool of water in the foreground.
The first shot is where I’ve adjusted the polariser to cut through the reflections off the surface of the pool and see through to the rock underneath. In the second I’ve adjusted to the opposite end where I have the maximum amount of reflection off the surface of the water (and as it happens off the rocks all around as well). Finally in the third image a minor adjustment again which is part way between – so it’s partially reflective and partially cut through.
Max Polarised
Min Polarised
Slight Polarised
Some more examples…
Removing Water Surface Reflections
Maximise the Reflections
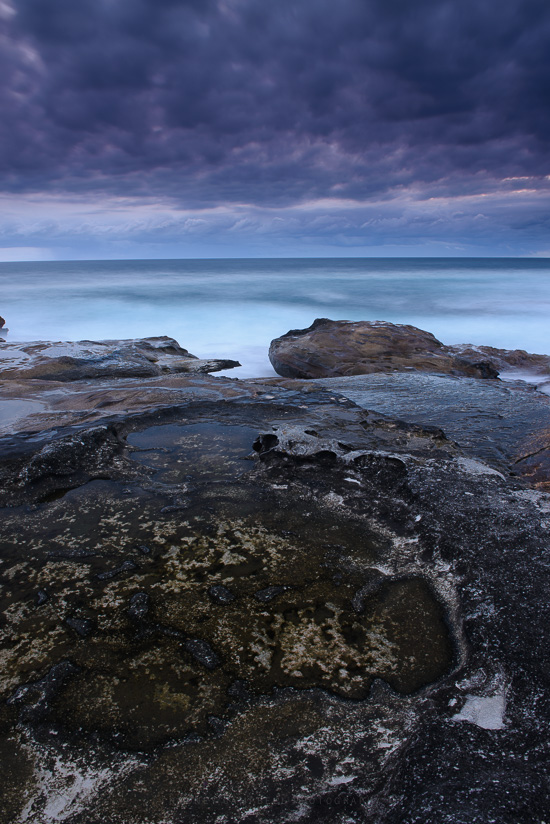
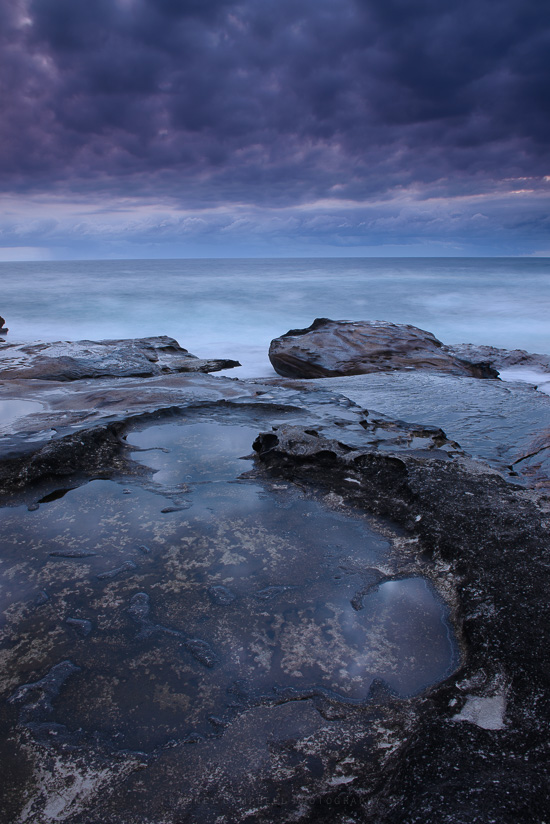
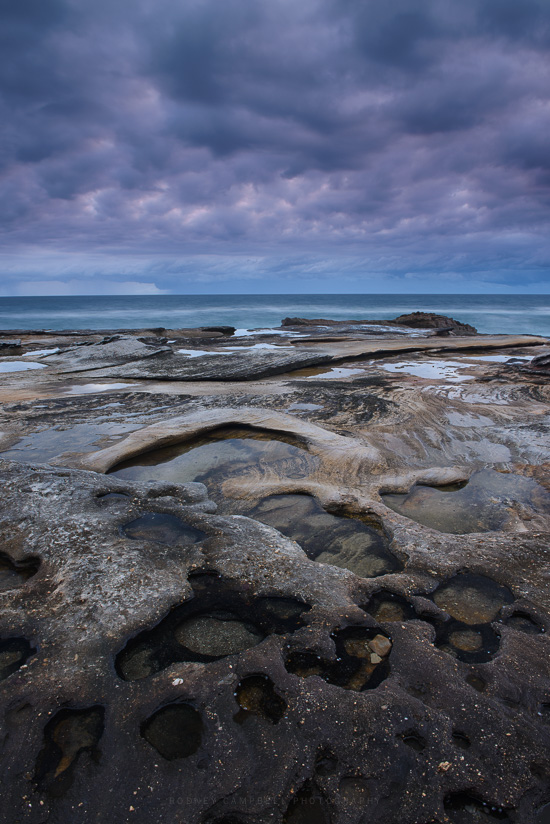
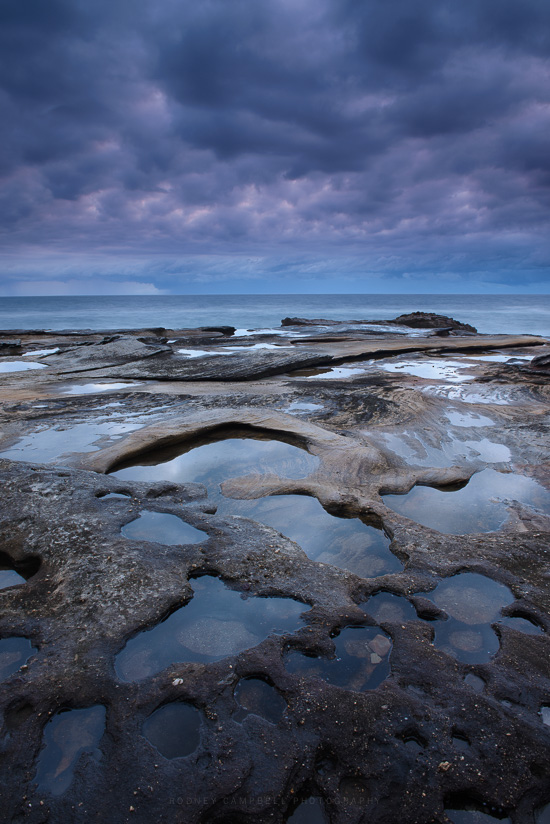
The example below is a typical use case where you have these small potholes in the rock which have pooled with water but sometimes there’s all sorts of interesting stuff under the water in the holes. Sometimes I want to use the polariser to cut through the reflections and see into the pools and the fantastic little worlds below. At other times like this where the rock is dark and moonscaped I like to have the surface of the water turn to bright varishaped smooth reflections surrounded by crunchy dark rock.
Stopping Reflections
Allowing the Mirrors
As I said – it’s about having options and using the tools to create the vision for the scene that you have in your head.
