SkyWatcher Star Adventurer Mini – First Look
by Rodney Campbell on Jun.17, 2019, under Life, Photography
Photographing the milky way and the stars above at night is often a technical battle against the limitations of very little light
Most of the stars in the night sky are very dim and thus astrophotography is literally a race against time to capture as much starlight as possible before star trailing sets in. The trailing of stars in an image is induced because of the rotation of the earth causing the stars to appear to be moving across the sky during an exposure
Typically the aim is to have nice point stars in an image and not little lines and arcs of varied length. Unless that is, the goal is to create a star trails photograph
There are essentially three in camera tools in a photographers toolbox to combat the issue of very dim stars and minimal light:
- Aperture – the wider/larger the aperture the more light will be allowed through to hit your camera sensor. This typically means the use of fast lenses with large maximum apertures like f/2.8, f/2.4, f/2, f/1.8 or f/1.4. However there are also typically negative consequences to faster lenses (other than just cost, size and weight). Faster lenses often have increased lens aberrations which negatively affect images of stars. e.g. coma, chromatic aberration, spherical aberration, astigmatism, etc. Stars should typically represent as point sources of light so aberrations which distort the shape, sharpness and edges of these point stars is more noticeable in astrophotography
- ISO – increasing the ISO can boost the apparent brightness of a captured image. However that also comes at the cost of increased noise, decreased dynamic range and the clipping of highlights (the stars loose their colour)
- Shutter Speed – increasing the shutter time to longer exposures does allow more light in. However it also leads to trailing stars as they move through the sky. Also the longer the (effective) focal length the quicker and more apparent star trailing occurs
This is why the use of very fast & ultra wide angle lenses (e.g. full frame 14mm f/1.8, 14mm f/2.4, 14mm f/2.5 or 14mm f/2.8) are very popular for astro photography. These both allow more light (due to aperture) and allow longer shutter speeds (due to wider field of view) (also allowing more light)
There is however another tool an astro photographer can use to combat the motion of the stars. An equatorial mount (more commonly known as a star tracker). These devices were originally invented to allow telescopes to automatically track objects in the night sky
They work by rotating at the same speed as the Earth, but in the opposite direction. For star trackers to work they also need to be aligned with the Earth’s rotational axis. This procedure is called polar alignment (essentially pointing the tracker towards the celestial pole). North or South depending on which hemisphere you are in
A star tracker allows photographers use longer focal lengths, smaller apertures and lower ISOs than you’d typically be able to use when shooting the night sky
A number of companies including SkyWatcher, iOptron and Vixen have been making a range of smaller, affordable, portable trackers for use with digital cameras
I just bought a tracker (the SkyWatcher Star Adventurer Mini kit). I purchased this particular unit because I also want to use some of it’s more unique additional features. Including it’s long exposure and astro timelapse functions. I also wanted a more compact lighter unit (for travel, etc). It just arrived so I’ve only done one quick test from my balcony at home at night
However even with a rough eyeball polar alignment (I didn’t use the latitude base or polar scope). I just used an app on my phone (PhotoPills) showing the equatorial grid, held up against the star tracker unit for manual alignment
The end result of some testing…
With the Samyang 14mm f/2.4 lens on the Z7. I got the same level of trailing (i.e. essentially pinpoint stars across the majority of the frame) in the extreme corners with an 180 second exposure using tracking (plus many more stars being visible) as I got with a 15 second exposure without tracking
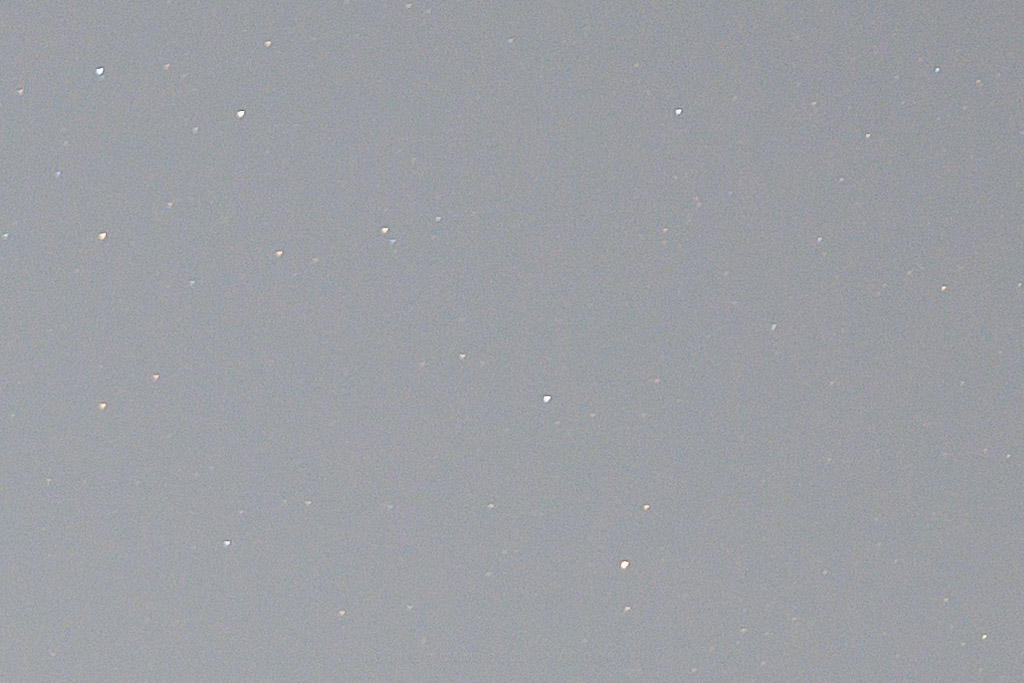
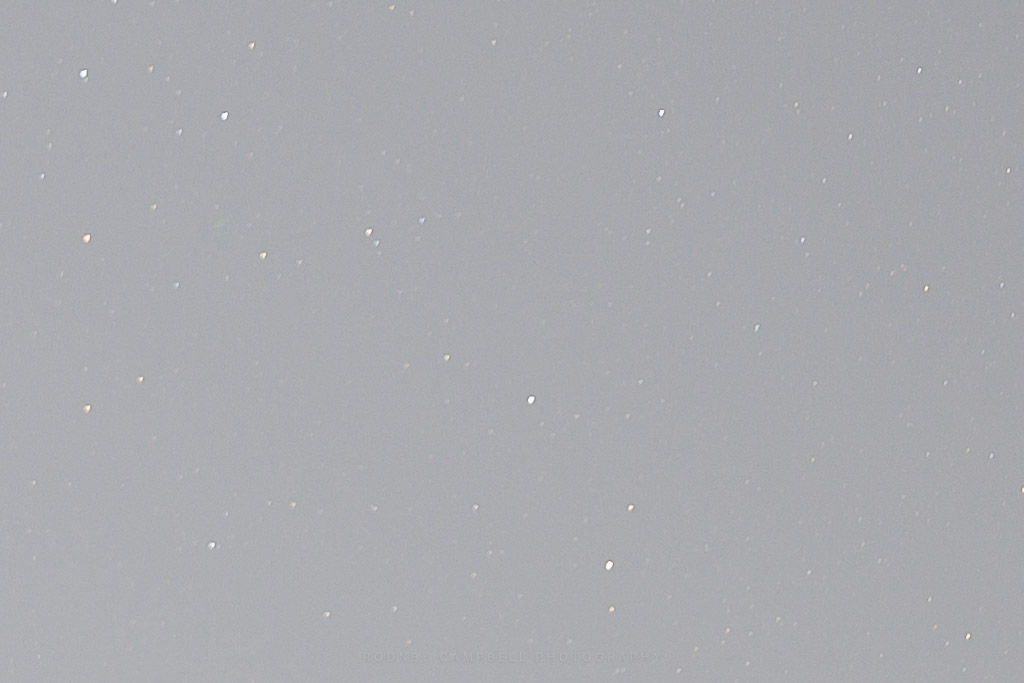
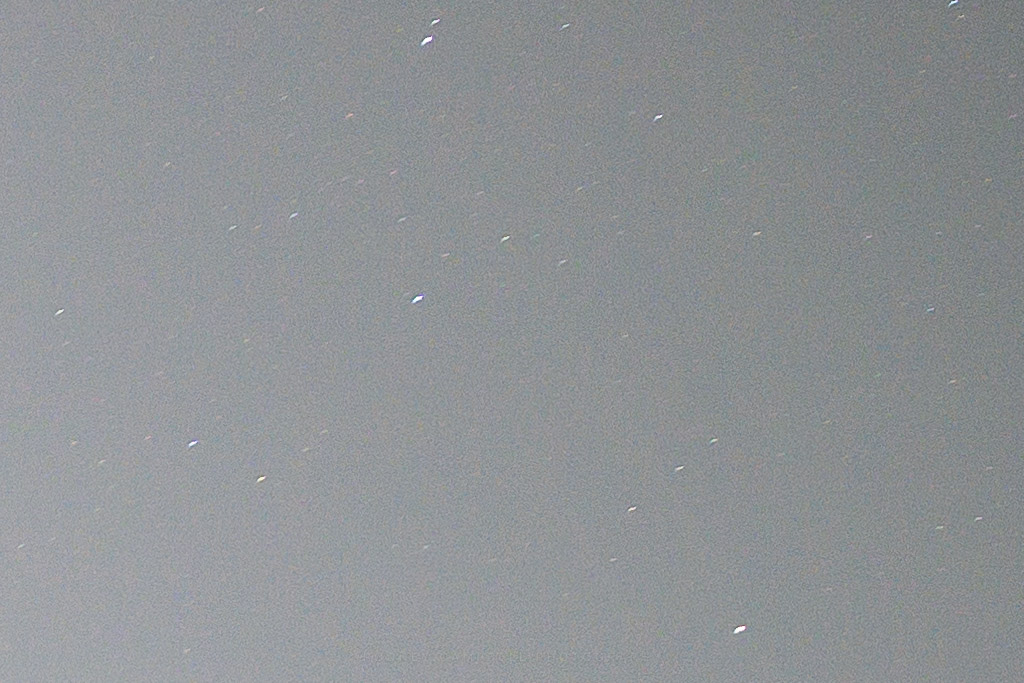
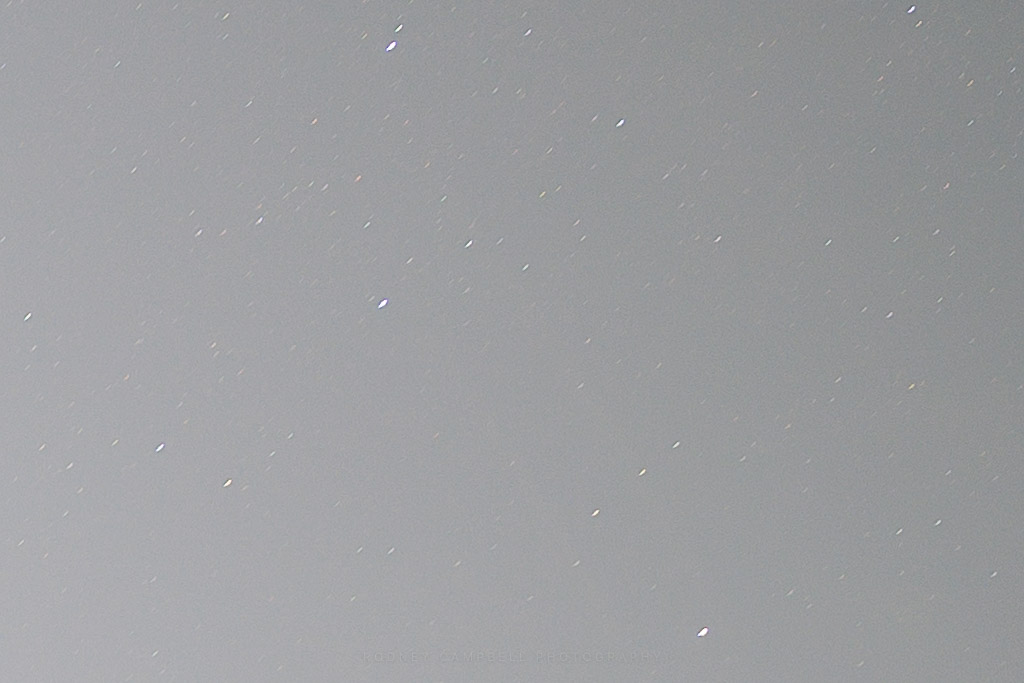
The following are some 100% crops taken from exactly the same pixel location in the two test images. The first pair are from towards the centre of the frame and then a pair at the extreme corners
Note that I shot with a large crescent moon in the frame – and in the city of Sydney, so I had quite a lot of light pollution. This meant I shot at lower ISO’s than I typically would in actual dark skies. It’s also why the test images are much more washed out than I’d expect under dark skies
Centre – Non Tracked – 15s
Centre – Tracked – 180s
Corner – Non Tracked – 15s
Corner – Tracked – 180s
Note: These photographs (especially the wider shots) look much better when larger. To see larger versions in an inline overlay slideshow gallery viewer click any of the images.
This means I should be able to shoot at approximately ISO 600 & 180 sec / ISO 800 & 160 sec @ f/2.4 instead of my more typical target of ISO 6400 & 15s @ f2.4 (on the Nikon Z7). This will result in much cleaner (less noisy and more dynamic range) images. OR I could use a slower aperture (e.g. f/4 on the 14-30/4 Z lens) AND still use a lower ISO (e.g. ISO 1600)
The test images I also shot at 10 sec untracked and 120 seconds tracked were also very similar. They had extremely pinpoint stars even to the extremes of the corners. However that’s likely overkill and just for pixel peepers
The NPF Rule for sharp stars for this camera sensor (pixel pitch), lens focal length & aperture combination results in a 15 second exposure. This compares with the old 500 Rule which suggests a 36 second exposure! So the NPF rule (15 sec) (closer to a 200 Rule) is already extremely conservative and gives pinpoint stars across the majority of the frame
If I do a proper polar alignment (using the included latitude base and polar scope) I may be able to shoot for even longer. However for really wide angle shots like I’m expecting to mostly be doing (e.g. 14 to 24mm) an approximate polar alignment process like I’ve done is probably going to be sufficient every time
So… so far so good – I’ll really put this to the test during my forthcoming 10 week trip through remote north west Australia. Dark skies heaven coming up…


-
Hi! Welcome to Rodney Campbell's Blog!
Thanks for dropping by! Feel free to join the discussion by leaving comments, and stay updated by subscribing to the RSS feed. See ya around!
Follow Me!


